


How to Choose the Best PCB Microsectioning Method for Defect Detection
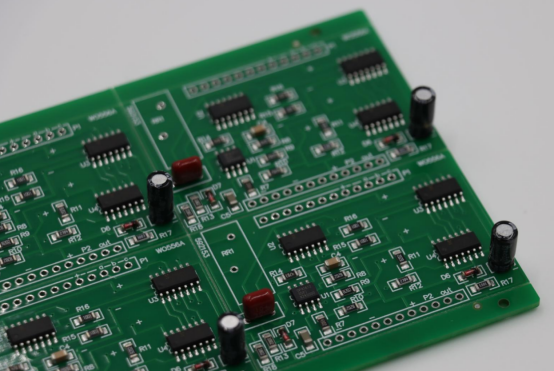
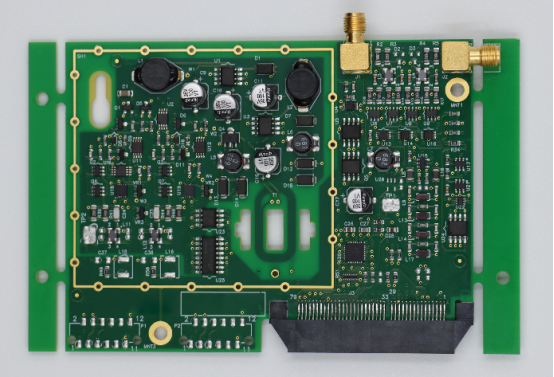
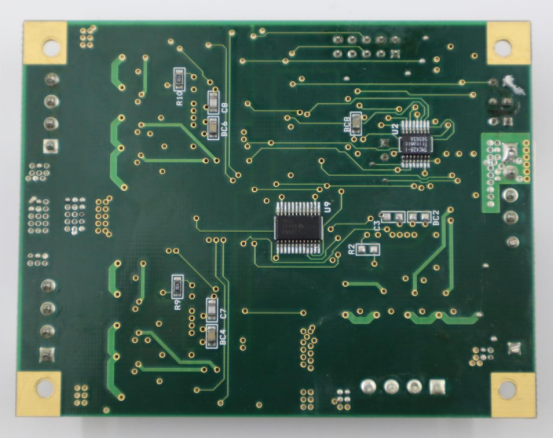
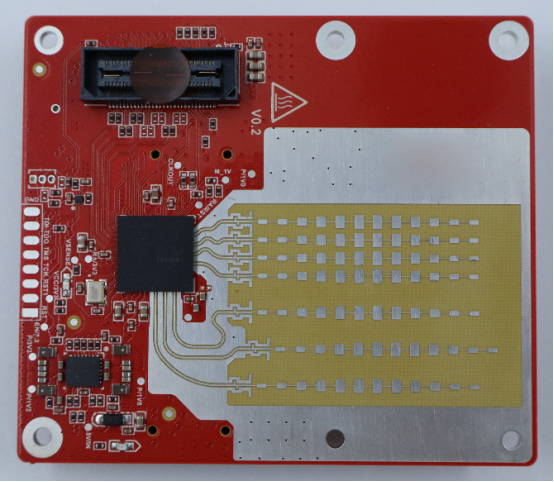
We all know that printed circuit boards (PCBs) are highly intricate, and even the smallest defect can lead to significant consequences, especially in industries like aerospace, medical devices, and automotive electronics. Common inspection methods, such as X-ray and Automated Optical Inspection (AOI), are great for surface checks, but they often miss the tiny, hidden flaws that can cause failures. PCB microsectioning stands out in this regard—it provides a clear cross-sectional view of the board, revealing issues that other techniques can't detect, ensuring the safety and reliability of high-risk electronics.
Understanding the Microsectioning Process for PCB Defect Detection
PCB microsectioning is a precise method used to uncover hidden defects in PCBs that are not visible with non-destructive methods. By slicing through the PCB’s layers, it reveals internal flaws critical to the performance and safety of electronics. Below, we’ll walk through the core steps of the process and explain why proper sample preparation is essential for accurate results.
Steps Involved in PCB Microsectioning
1. Sample Selection and Cutting
Choosing the right area of the PCB is key to detecting defects. A small section (5-10mm) is cut from high-risk areas like vias or solder joints using a diamond saw. This tool ensures a clean cut without damaging the layers, using water cooling to prevent overheating.
2. Mounting in Epoxy Resin
After cutting, the sample is embedded in epoxy resin to stabilize it. This resin hardens at a controlled temperature, preventing the sample from shifting or breaking during grinding and polishing.
3. Grinding and Polishing
The mounted sample is ground and polished using progressively finer abrasives, starting with coarse grit and moving to finer materials like 0.3-micron alumina paste. This process smooths the surface and reveals internal details, without creating new defects.
4. Final Inspection with High-Magnification Microscopes
After polishing, the sample is inspected with a metallographic microscope or scanning electron microscope (SEM) at magnifications up to 1000x. These microscopes reveal tiny internal defects like micro-cracks, voids, or misalignment of layers.
Why Sample Preparation Is Crucial for Accurate Results
Avoiding Artifacts Like Crushed Vias or Polishing Scratches
Proper preparation ensures that no artifacts, such as crushed vias or polishing scratches, appear in the sample. These can mislead results and cause inaccurate assessments of the PCB’s quality.
How Poor Preparation Leads to Misleading Results
If preparation is rushed or improper, issues like misaligned layers or false defects can occur. This can lead to incorrect conclusions, affecting the overall reliability of the PCB.
Tools and Materials Essential for Effective Preparation
Key tools for successful microsectioning include diamond saws for cutting, epoxy resin for mounting, and fine abrasives for grinding and polishing. Proper use of these materials is vital for accurate results.
Advantages of Microsectioning Over Non-Destructive Methods (X-Ray, AOI)
While non-destructive methods like X-ray and AOI are useful for detecting surface-level defects, they often fall short when it comes to identifying hidden issues within the PCB layers. PCB microsectioning stands out by providing a much more precise, cross-sectional analysis that uncovers defects that could cause failures in high-reliability applications. In this section, we'll examine how microsectioning compares to X-ray and AOI, highlighting its precision in detecting hidden defects, its role in root-cause analysis, and the cost and time considerations for choosing the right method.
Microsectioning's Precision in Detecting Hidden Defects
Defects Detected: Micro-Cracks, Delamination, Plating Voids, Misaligned Vias
Microsectioning excels at uncovering tiny defects like micro-cracks in copper traces, delamination (layer separation), plating voids in vias, and misaligned vias. These defects are often invisible to non-destructive methods like X-ray and AOI. In critical industries such as aerospace, medical devices, and automotive electronics, even these small flaws can lead to catastrophic failures, making microsectioning an invaluable tool for ensuring PCB reliability.
Comparing Microsectioning to X-ray and AOI
X-ray and AOI are quick, non-destructive methods that can detect surface defects. However, they have limitations:
X-ray: While it’s excellent for detecting larger internal defects (e.g., missing solder balls or voids under BGAs), it struggles to identify smaller flaws like micro-cracks or plating voids smaller than 50μm.
AOI: AOI can detect surface-level defects like missing components or misalignments, but it cannot inspect internal layers. This means delamination or cracked vias in hidden layers go unnoticed.
Microsectioning: In contrast, microsectioning provides a direct cross-sectional view of the PCB, allowing for the detection of defects as small as 5μm, making it much more effective for identifying tiny, hidden flaws.
The Role of Microsectioning in Root-Cause Analysis
Why Microsectioning is Essential for Troubleshooting PCB Failures
Microsectioning plays a critical role in troubleshooting PCB failures. Non-destructive methods like X-ray and AOI can flag potential issues, but they don’t provide enough detail to determine the exact cause of the problem. For instance, in aerospace or medical devices, a PCB failure may be due to a cracked via or poor copper plating. X-ray or AOI may indicate a defect, but they won't reveal its origin. Microsectioning enables a deep dive into the PCB layers, pinpointing the exact cause of the issue.
Locating the Exact Cause of a Failure
Cross-sectional analysis provided by microsectioning helps identify defects that affect performance. For example, if a PCB is failing due to thermal cycling, microsectioning might reveal cracks in the copper or misalignment of vias that could lead to failure. This level of precision is essential for root-cause analysis, allowing engineers to fix the issue at the design or manufacturing stage before it causes a failure in the field.
Cost and Time Considerations: When to Use Microsectioning vs. Non-Destructive Tests
Efficiency Trade-offs: Time and Cost Comparisons
Microsectioning is a more time-consuming and costly process compared to non-destructive techniques like X-ray and AOI. The entire microsectioning process involves cutting, mounting, grinding, polishing, and inspecting the sample, which typically takes several hours per sample. X-ray and AOI, on the other hand, can quickly scan a large number of PCBs in a short period.
X-ray: Fast, effective for bulk inspection, especially for larger internal voids or solder issues.
AOI: Very quick for checking surface defects, but limited to surface-level inspection.
Microsectioning: Slow and labor-intensive, but capable of providing precise, in-depth analysis for internal defects.
While microsectioning may not be suitable for large-scale inspections due to its time and cost, it’s essential when precise defect detection is required for high-reliability applications.
Choosing the Right Tool for the Job
The choice between microsectioning and non-destructive methods like X-ray and AOI depends on the specific inspection needs:
X-ray is ideal for quick inspections of large quantities of PCBs where internal flaws are suspected but not critically small.
AOI is perfect for high-speed surface inspections, checking components and ensuring placement.
Microsectioning should be used for root-cause analysis or when the exact internal defects (like micro-cracks or plating voids) must be identified in critical applications.
Comparison Table: Microsectioning vs. X-ray and AOI
Aspect Microsectioning X-ray Inspection AOI Defects Detected Micro-cracks, delamination, plating voids, misaligned vias Larger internal voids, solder issues Surface defects (misplaced components, missing solder) Detection Size Detects defects as small as 5μm Detects defects larger than 50μm Surface defects only (no internal view) Time per Sample Several hours per sample Minutes per sample Seconds per sample
Cost Higher (due to time and equipment) Lower (quicker inspection process) Lower (rapid surface inspection) Best Use Case Root-cause analysis, precise defect detection Fast bulk inspections, large internal voids High-speed surface inspections, component checks
Choosing the Right Microsectioning Technique Based on PCB Type and Defect Goals
When it comes to inspecting PCBs, selecting the right microsectioning technique is essential for effective defect detection. Different types of PCBs require different approaches based on the complexity of the design and the type of defects you're targeting. In this section, we’ll break down the three main microsectioning methods: mechanical cutting, precision grinding and polishing, and etching. Each has its unique strengths and is best suited for specific PCB types and defect goals.
Mechanical Cutting for General Layer Checks
Overview of Mechanical Cutting
Mechanical cutting is a basic and widely used microsectioning technique. It involves using a diamond saw to cut a small section of the PCB, typically around 5-10mm, from a region of interest. This cut provides a cross-sectional view that reveals internal layers, vias, and solder joints.
Best for Initial Screening
Mechanical cutting is ideal for initial screening of PCBs. It allows you to quickly assess whether the layers of the PCB are aligned properly and check for major structural issues like delamination or incomplete via fills. This method is especially useful when you need a fast overview without focusing on fine details.
For example, in an aerospace PCB that is used for critical applications, mechanical cutting can help identify if there are separation layers or misaligned vias that could impact the overall function.
Cost and Time Efficiency
Mechanical cutting is also highly cost-effective and time-efficient. It is the perfect choice for low-budget applications or situations that require a faster turnaround. This technique typically takes 1-2 hours per sample, making it much quicker than other methods like precision grinding and polishing.
While it doesn't provide the fine detail of other techniques, its speed and low cost make it a go-to choice for general inspections.
Precision Grinding & Polishing for Fine Defect Detection
Overview of Precision Grinding & Polishing
Precision grinding and polishing take mechanical cutting a step further. After the initial cut, the sample is ground using progressively finer abrasives (ranging from 80-grit to 0.3-micron alumina paste) to achieve a smooth, defect-free surface. This method provides a mirror-like finish that is necessary for inspecting fine defects such as micro-cracks, plating voids, or thin dielectric layers that might be missed by less detailed techniques.
Ideal for HDI and Flexible PCBs
This technique is especially useful for inspecting High-Density Interconnect (HDI) and flexible PCBs. HDI PCBs are often very small and packed with microvias and thin layers. Precision grinding and polishing allows engineers to inspect microvias, stacked vias, or other tiny features that can lead to signal loss or short circuits if defects are present.
For example, in medical device PCBs, where even the smallest defect could lead to malfunction, precision grinding and polishing can reveal flaws that affect the performance and safety of the device.
Investment in High-Precision Equipment
While this method offers detailed inspection, it requires specialized equipment. Automated polishers and SEM are essential to achieve high precision and ensure accurate defect detection at a magnification of up to 1000x. SEM is particularly useful for inspecting the fine details of the PCB's internal structure, providing crucial information about defects like copper micro-cracks or plating inconsistencies.
Due to the need for high-precision equipment and skilled operators, this technique can be more expensive than mechanical cutting, but it is crucial for thorough inspections of complex PCBs.
Etching for Microstructural Inspections
Overview of Etching
Etching is a chemical process used to reveal microstructural details in a PCB. After the sample has been polished, a chemical etchant is applied to selectively remove material and highlight features such as copper grain boundaries, solder joint quality, or hidden micro-voids in the dielectric layers. This technique helps uncover flaws that might be invisible to polishing and grinding alone.
Best for Solder Joint and Copper Grain Analysis
Etching is particularly effective for inspecting solder joints and copper grain structures. For example, it can reveal stress cracks along the grain boundaries in flexible PCBs, which could lead to intermittent connections or eventual failure due to bending and thermal cycling. Etching also allows for a more detailed inspection of solder joint quality, which is critical in automotive and aerospace industries where component reliability is non-negotiable.
For example, in automotive electronics, etching can help identify cold solder joints or poor bonding between the solder and the PCB pad, preventing potential failures in Advanced Driver Assistance Systems (ADAS).
Challenges of Over-Etching
While etching is highly effective, it requires careful control. Over-etching can damage delicate PCB features like microvias or thin copper layers, which can render the sample unusable. For this reason, strict time control is necessary to ensure that the etching process does not damage critical parts of the PCB.
Proper neutralization of the etchant and careful inspection during the etching process are essential to avoid over-etching and to ensure that the microstructural features are clearly visible without compromising the integrity of the PCB.
Summary of Microsectioning Techniques: Choosing the Right Tool for the Job
Technique Best For Ideal PCB Type Time & Cost Efficiency Mechanical Cutting General layer alignment, major structural issues Basic or low-complexity PCBs (rigid, simple) Fast and cost-effective (1-2 hours per sample) Precision Grinding & Polishing Micro-cracks, voids, fine defect detection HDI, flexible, and high-precision PCBs Requires precision equipment (costly and time-consuming, 3-4 hours per sample) Etching Solder joint and copper grain analysis Flexible PCBs, high-reliability applications Low-cost but requires careful time control
Ensuring High-Quality Results: Key Best Practices for Microsectioning
Microsectioning is an essential tool for inspecting PCBs, but achieving high-quality, reliable results requires precision and attention to detail. Common mistakes in the process can lead to artifacts or false findings that undermine the entire inspection. This section will cover key best practices to ensure high-quality outcomes in PCB microsectioning, focusing on avoiding common artifacts, and perfecting the sample preparation and polishing stages.
Avoiding Common Artifacts in Microsectioning
Artifact Risks: Crushed Vias, Scratches, Etching Residue, and How to Avoid Them
Artifacts are false defects that can appear during the microsectioning process, often due to improper technique or equipment misuse. The most common artifacts include:
Crushed vias: If too much pressure is applied during the cutting process, vias (tiny holes in the PCB that connect layers) can be crushed, leading to misleading results. These "crushed vias" may appear as defects, though they weren’t present in the original PCB.
Scratches: Skipping grit stages during grinding or using the wrong abrasives can lead to visible scratches on the surface. These scratches can mimic actual defects like micro-cracks, causing confusion during the inspection phase.
Etching residue: If the etching process isn’t properly controlled, leftover chemical residue can create false impressions, such as what appears to be a plating void or copper defect.
How to Avoid Artifacts Through Proper Technique
To avoid these artifacts, strict attention to detail is required:
Cutting: Always use a diamond saw with proper water cooling and slow, steady movements. This prevents overheating and minimizes the risk of crushing vias.
Grinding: Follow a sequential grinding process, starting with coarse abrasives and progressively moving to finer ones. This ensures that any large imperfections are smoothed out before high-resolution polishing begins.
Etching: Use the appropriate chemicals and control etching time carefully. Always neutralize the etchant after use to prevent damaging the sample or causing residue buildup.
Best Practices for Sample Preparation and Polishing
Sequential Grinding and Polishing: Why Skipping Grit Stages Leads to Incomplete Surfaces
One of the most critical aspects of microsectioning is proper grinding and polishing. If done incorrectly, the sample’s surface may be uneven or have scratches, compromising the entire inspection. Here’s why sequential grinding is essential:
Progressive Abrasive Stages: Always start with a coarse grit to remove excess material and shape the sample. As you progress, use finer grits to smooth the surface and eliminate any large imperfections. The final polishing stage with 0.3-micron alumina paste creates a mirror-like finish, allowing for high-precision inspection with SEM or metallographic microscopes.
Skipping Grit Stages: If you skip a grit stage, you risk leaving deep scratches from the previous abrasives that will interfere with the subsequent stages. For example, moving from 80-grit directly to 1200-grit may leave scratches that will be impossible to remove with the finer abrasives.
Proper Use of Epoxy and Mounting: Techniques for Ensuring Stable and Accurate Cross-Sections
Proper mounting of the PCB sample is crucial for maintaining structural integrity throughout the microsectioning process. The mounting step stabilizes the sample during grinding and polishing, preventing the layers from shifting or breaking.
Epoxy Resin: Always use the correct epoxy and ensure that the sample is thoroughly embedded. The resin should completely surround the sample and cure at the right temperature (typically 60–80°C for 1-2 hours). This ensures that the sample doesn’t shift during polishing or grinding, which could lead to inaccurate cross-sections.
Mounting: When mounting the sample, be sure to apply even pressure so that all layers are properly aligned and the resin doesn’t form air pockets or voids. This step is particularly important when inspecting complex PCBs with multiple layers or HDI designs, where precision is critical.
Conclusion: Optimizing PCB Defect Detection with Microsectioning
Microsectioning is essential for detecting PCB defects that non-destructive methods often miss, especially in high-reliability industries like aerospace, medical, and automotive. It provides detailed cross-sectional views, revealing hidden flaws such as micro-cracks and plating voids that could lead to failures.
While X-ray and AOI are useful for surface-level inspections, they can't uncover internal issues. Combining microsectioning with these non-destructive methods ensures thorough, reliable testing.
At PCBMASTER, we integrate advanced defect detection techniques to ensure the highest quality in PCB production. By combining microsectioning with non-destructive testing, we deliver dependable, high-performance boards that meet industry standards and help prevent costly failures.
FAQs on PCB Microsectioning Techniques
How Small a Defect Can Microsectioning Detect?
Microsectioning is highly effective in detecting extremely small defects, down to 5 micrometers. This level of precision allows it to uncover flaws that are typically beyond the reach of non-destructive methods like X-ray, making it ideal for high-reliability applications where even the smallest defect can lead to failure.
Can I Reuse a PCB After Microsectioning?
No, microsectioning is a destructive testing method. Once a PCB sample is cut and analyzed, it cannot be reused in its original form. However, to avoid wasting final products, manufacturers often use test coupons—small, identical sections attached to the main PCB—to validate quality without damaging the actual product.
How Does Microsectioning Compare to X-ray for Detecting Micro-Cracks?
X-ray inspections are effective for detecting surface defects but struggle with small cracks, especially those smaller than 50 micrometers. Microsectioning, on the other hand, can identify micro-cracks as tiny as 5 micrometers, providing a much more detailed view of potential issues. This makes microsectioning particularly crucial for applications where reliability is critical, such as aerospace and medical devices.
What Is the Cost of Microsectioning Equipment?
The cost of microsectioning equipment varies based on the level of precision required. Basic setups, including a diamond saw and optical microscope, typically cost around $10,000. For high-precision work, such as with SEM and automated polishers, the cost can range from $50,000 to $100,000.
How Long Does It Take to Perform Microsectioning?
The time required for microsectioning depends on the technique used. Mechanical cutting typically takes 1–2 hours, while precision grinding and polishing can take 3–4 hours to achieve a high-resolution surface. If etching is needed for further microstructural analysis, it adds an additional 30 minutes to the process.
Author Bio
Hi, I'm Carol, the Overseas Marketing Manager at PCBMASTER, where I focus on expanding international markets and researching PCB and PCBA solutions. Since 2020, I've been deeply involved in helping our company collaborate with global clients, addressing their technical and production needs in the PCB and PCBA sectors. Over these years, I've gained extensive experience and developed a deeper understanding of industry trends, challenges, and technological innovations.
Outside of work, I'm passionate about writing and enjoy sharing industry insights, market developments, and practical tips through my blog. I hope my posts can help you better understand the PCB and PCBA industries and maybe even offer some valuable takeaways. Of course, if you have any thoughts or questions, feel free to leave a comment below—I'd love to hear from you and discuss further!

