


Top 10 PCBA Tools Every Electronics Engineer Must Have
In Printed Circuit Board Assembly (PCBA), precision is essential. The right tools ensure accurate component placement, reliable soldering, and thorough testing—key factors in producing high-quality PCBs. Without the proper equipment, even small mistakes can lead to costly errors.
Engineers rely on a variety of PCBA tools to streamline the assembly process, reduce errors, and improve efficiency. Each tool serves a unique function, from soldering to inspection, making them indispensable in any electronics workshop.
The following Top 10 PCBA tools are crucial for every electronics engineer, helping to ensure that every assembly step is performed with precision and quality in mind.
The Essential Hand Tools for PCBA Assembly
1. Soldering Iron
Purpose:
A soldering iron is used to attach components to a PCB by melting solder to create strong electrical connections. It’s essential for placing components onto the board and ensuring that all connections are stable and functional.
Key Features:
Adjustable Temperature: Allows for precise control, preventing overheating of sensitive components.
Ergonomic Handle: Reduces hand fatigue during long assembly sessions.
Compatibility with Tip Sizes: Different tip sizes and shapes allow for various tasks, such as fine-pitch soldering or larger connections.
Examples:
Weller WES51: A popular, reliable model for beginners and professionals alike. Known for its precise temperature control and durability.
Hakko FX888D: A more advanced model offering excellent performance, rapid heating, and a wide variety of compatible tips.
Tip:
When choosing between analog vs. digital soldering irons, digital models offer more precise temperature control, ideal for sensitive components. Analog versions are simpler and typically more affordable but lack the fine control of digital models.
2. Desoldering Pump
Purpose:
A desoldering pump is used to remove excess solder from PCB pads, allowing components to be easily replaced or repositioned without damaging the board.
Types:
Manual Desoldering Pumps: These require you to press a button to create suction that pulls the melted solder into the pump. They are cost-effective but require a steady hand.
Electric Desoldering Pumps: These provide automatic suction, making the process faster and more efficient, especially for heavy-duty work.
Examples:
Quick 861DW: A high-performance electric desoldering pump that provides fast and clean solder removal.
Engineer SS-02: A reliable manual pump, ideal for smaller-scale work or for engineers who prefer hands-on control.
Key Features:
Strong Suction Power: Ensures the complete removal of solder, leaving pads clean and ready for rework.
Easy-to-Clean Mechanism: Simple to disassemble and clean, ensuring the pump remains effective over time.
3. Tweezers
Purpose:
Tweezers are used for the precise handling and placement of small components, such as surface-mount devices (SMDs), during assembly. They are vital for ensuring accuracy, particularly when working with tiny parts.
Material:
Stainless Steel: Offers durability and strength, but may conduct static electricity, which can damage sensitive components.
Anti-Magnetic Tweezers: Prevent static discharge, which is especially important when handling delicate electronic components.
Examples:
ESD-Safe Tweezers (e.g., Knipex, Hakko): These are specially designed to prevent electrostatic discharge (ESD), a common cause of damage to sensitive parts.
Tip:
When selecting tweezers, prioritize ESD-safe models. These reduce the risk of static damage, which can be detrimental to modern electronic components. ESD-safe tweezers are often made from materials like carbon fiber or special anti-static coatings.
By ensuring that each of these hand tools is carefully selected, engineers can perform precise and efficient assembly tasks, improving both the quality and speed of their PCBA processes. These tools are fundamental to handling components, from initial placement to troubleshooting and rework.
Advanced Tools for High Precision and Efficiency
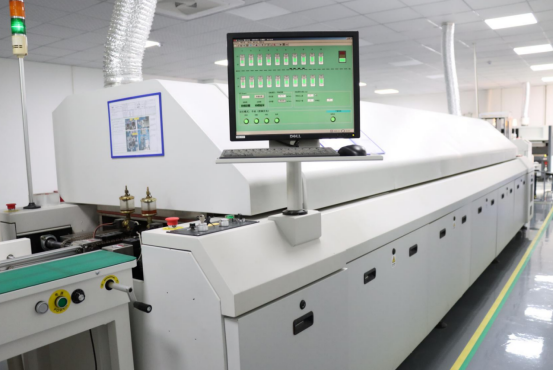
4. Reflow Oven
Purpose:
A reflow oven is primarily used for soldering surface-mount components (SMDs) onto a printed circuit board (PCB). It melts the solder paste, allowing components to securely bond to the board during the soldering process.
How It Works:
1. Solder Paste Application: First, solder paste is applied to the PCB pads.
2. Component Placement: Surface-mount components are placed onto the PCB.
3. Heating Process: The PCB is placed in the reflow oven, where it moves through a series of heating zones. The temperature gradually increases until the solder paste melts, securing the components to the PCB.
4. Cooling: Once the solder has melted and formed the connection, the PCB is cooled, solidifying the solder joints.
Example:
Weller WHA900: A compact reflow oven suitable for small batches of PCBs, offering excellent control over temperature profiles.
Quick 850A: A high-quality, more advanced oven, designed for high-volume production, providing precise temperature control for even larger boards.
Tip:
When choosing a reflow oven, consider factors like temperature control, oven size, and reliability. Precise control of temperature ensures uniform heating, which is crucial for creating strong solder joints without damaging components. Additionally, the size of the oven should match the scale of your production or prototyping needs.
5. Hot Air Rework Station
Purpose:
A hot air rework station is used to remove and replace surface-mount components (SMDs), especially when desoldering is necessary or when reworking a PCB after assembly.
Examples:
Weller WHA900: A reliable hot air station ideal for both small-scale and medium-scale rework tasks.
Hakko FR301: Known for its precise airflow and temperature control, it’s a popular choice among professionals for its versatility and efficiency.
Key Features:
Adjustable Airflow: Provides control over the speed and direction of airflow, crucial for delicate components.
Temperature Control: Essential for preventing overheating of both the components and PCB during the desoldering process.
Interchangeable Nozzles: Different nozzle sizes and shapes help target specific components, making it easier to rework various sizes of SMDs.
Step-by-Step: How to Safely Use a Hot Air Rework Station
1. Preheat the Station: Set the temperature and airflow to appropriate levels based on the component type.
2. Position the Nozzle: Attach the correct nozzle for the component you're working on.
3. Direct Airflow: Hold the nozzle at a safe distance from the component and heat the area until the solder melts.
4. Remove the Component: Use tweezers to gently lift the component off the PCB.
5. Clean the Area: Use a desoldering braid or suction pump to remove any leftover solder.
6. Inspect and Rework: Once the component is removed, inspect the pads for damage and proceed with placing the new component.
By using a hot air rework station, engineers can efficiently and safely replace faulty components or make changes to existing assemblies. It’s essential for precision in rework tasks, particularly when dealing with sensitive SMDs.
These advanced tools—reflow ovens and hot air rework stations—are indispensable for ensuring high-precision assembly in PCBA processes. Whether you're assembling new boards or reworking existing ones, these tools offer the control and reliability needed to deliver flawless results.
Testing and Inspection Tools for PCBA Quality Control
6. Multimeter
Purpose:
A multimeter is used to measure electrical values such as voltage, current, and resistance across circuits. It is essential for quickly troubleshooting issues and verifying that components are functioning correctly during the assembly process.
Features:
Digital vs. Analog: Digital multimeters (DMMs) provide more precise, easily readable measurements, while analog meters are simpler and often preferred for basic tasks.
Auto-Ranging: This feature automatically adjusts the multimeter’s range, making it easier to measure varying electrical values without manually switching ranges.
High Accuracy: Quality multimeters provide high accuracy and reliable readings, which are crucial for debugging and testing PCBA circuits.
Examples:
Fluke 87V: Known for its high precision, durability, and wide range of features, making it ideal for professional use.
Klein Tools MM6000: A reliable and affordable option with a high degree of accuracy, suitable for both professional and DIY applications.
Tip:
To use a multimeter for quick troubleshooting in PCBAs, start by checking for continuity, ensuring that power paths are intact. Then measure voltages at various points on the PCB to identify any discrepancies in expected readings, helping you pinpoint problem areas.
7. Oscilloscope
Purpose:
An oscilloscope is used to visualize waveform signals within a circuit. It helps engineers diagnose issues related to signal integrity, timing, and overall circuit performance, particularly in high-speed or analog circuits.
Types:
Analog Oscilloscopes: Offer real-time signal viewing, but are less flexible and precise than digital models. Suitable for basic signal analysis.
Digital Oscilloscopes: Provide more advanced features, including signal storage, complex analysis, and better accuracy in capturing high-frequency signals.
Examples:
Rigol DS1054Z: A digital oscilloscope known for its affordability and impressive features, such as a high sample rate and 50 MHz bandwidth.
Tektronix TBS2000: A higher-end model with superior signal clarity, increased bandwidth, and multiple channels for more complex analysis.
Key Features:
Bandwidth: Determines the range of frequencies the oscilloscope can capture; higher bandwidth is needed for high-frequency signals.
Sample Rate: Indicates how frequently the oscilloscope captures data points. A higher sample rate gives a more accurate representation of the signal.
Number of Channels: Multiple channels allow you to observe several signals at once, which is helpful when analyzing multi-signal systems.
8. PCB Inspection Microscope
Purpose:
A PCB inspection microscope is used for visual inspection of fine components, traces, and solder joints. It’s essential for detecting small defects that may not be visible to the naked eye, such as poor solder joints, misaligned components, or damaged PCB traces.
Types:
Optical Microscopes: Use light and lenses to magnify objects for inspection. They’re often used in labs and workshops for high-resolution visual examination.
Digital Microscopes: Combine optical magnification with digital imaging, allowing for easier documentation and sharing of inspection results.
Examples:
AmScope SE400-Z: A high-quality optical microscope offering a good balance of magnification (up to 70x) and affordability.
OMAX 40X-2000X: A more advanced digital microscope, providing high magnification (up to 2000x) and clear image resolution, ideal for detailed inspection of tiny components.
Key Features:
Magnification Range: Determines how much the microscope can enlarge the object. Higher magnification is needed for inspecting fine components like SMDs and solder joints.
Lighting: Proper lighting is crucial for clear inspection. Adjustable lighting helps illuminate the PCB without causing glare or shadows.
Image Clarity: The resolution of the optics or digital camera plays a key role in visualizing defects. Higher clarity ensures no defects are overlooked during inspection.
Each of these testing and inspection tools plays a crucial role in PCBA quality control. The multimeter helps check electrical values, the oscilloscope ensures signal integrity, and the inspection microscope provides high-detail visual analysis. Together, these tools help engineers maintain high standards of quality and reliability in PCB assembly.
Automated Tools for Large-Scale Production
9. Pick and Place Machine
Purpose:
A Pick and Place machine automates the process of placing electronic components (like resistors, capacitors, and ICs) onto printed circuit boards (PCBs) during the assembly phase. It significantly increases production speed and ensures precise component placement, especially in large-scale manufacturing environments.
How It Works:
The machine uses machine vision to accurately identify the position of each component and its placement on the PCB. It then picks up the component from a tray or tape reel using a vacuum nozzle and places it on the board with high precision. The vision system ensures that the components are correctly oriented and placed in the correct positions, reducing the chance of errors.
Examples:
Neoden 4: A versatile, user-friendly pick and place machine, suitable for small to medium production runs. It offers high-speed placement and precise accuracy, making it ideal for prototyping and low-volume production.
Juki KE-2080: A more advanced model designed for high-volume production. It features an intelligent vision system and can place components at very high speeds with high precision.
Key Features:
Speed: High-speed operation enables faster production, reducing cycle time and increasing throughput.
Accuracy: Automated placement ensures consistent and precise positioning of components, minimizing human error.
Component Compatibility: Capable of handling a wide variety of component sizes and types, including both surface-mount devices (SMDs) and through-hole components.
Tip:
For small-to-medium production runs, consider a pick and place machine like the Neoden 4, which balances cost and capability. It is well-suited for prototypes or low-volume production, while larger, more complex models like the Juki KE-2080 are better for high-volume manufacturing.
10. Automatic Optical Inspection (AOI) System
Purpose:
An Automatic Optical Inspection (AOI) system is used to detect defects and inconsistencies in the assembly process, such as misaligned components, soldering issues, and missing parts. It ensures that PCBAs meet quality standards before moving on to the next production stage, minimizing the risk of faulty products reaching customers.
How It Works:
The AOI system uses high-resolution cameras to take detailed images of the PCB surface. These images are then compared to a golden reference or pre-programmed design files. The system checks for visual defects like solder bridges, open circuits, or incorrect component placements. Any discrepancies are flagged for further inspection or correction.
Examples:
Koh Young Zenith: A leading AOI system that provides high-speed, high-precision inspections. Known for its advanced 3D inspection capabilities, it offers superior defect detection in complex assemblies.
Mirtec MV-6: Another high-performance AOI system that combines high-resolution cameras with intelligent algorithms to detect even the smallest defects.
Key Features:
Resolution: High-resolution cameras ensure that even the tiniest defects are detected with accuracy.
Defect Detection Algorithms: Advanced algorithms can identify a wide range of issues, including soldering flaws, component misalignment, and missing parts.
Ease of Integration: AOI systems can easily integrate with existing production lines, providing real-time feedback to operators and improving overall process efficiency.
These automated tools, the Pick and Place machine and AOI system, are essential for large-scale PCBA production. They ensure that high volumes of PCBs are assembled quickly and accurately, while maintaining the highest quality standards. By automating key processes like component placement and defect inspection, manufacturers can reduce errors, increase throughput, and improve the overall efficiency of the assembly process.

Special Tools for Handling and Maintenance
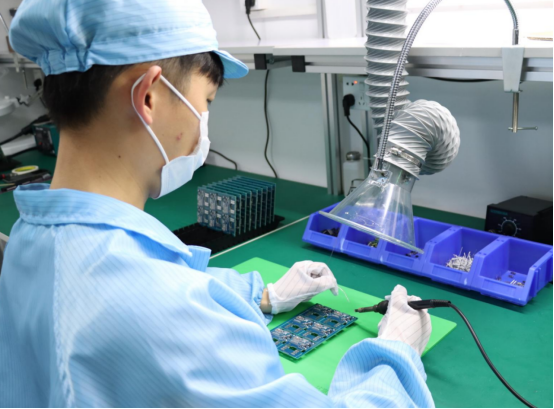
1. ESD Mats and Straps
Purpose:
ESD mats and wrist straps are essential for protecting sensitive electronic components from electrostatic discharge (ESD), which can damage or even destroy microchips, transistors, and other delicate parts during handling. These tools create a safe, grounded environment to prevent static buildup and discharge.
Materials:
Anti-static Mats: These mats are made from conductive or dissipative materials that prevent the buildup of static electricity on surfaces where components are placed or assembled.
Grounding Wrist Straps: These wristbands are worn by engineers and are grounded to dissipate any static charge from the body, reducing the risk of electrostatic discharge onto the components.
Ionizers: Used to neutralize static charges in the air, ensuring that components remain free from harmful static buildup.
Example:
Xcelite 99170: A high-quality anti-static mat that provides an effective shield against static, ensuring safe handling of components.
3M 700 Series Mats: These ESD-safe mats are commonly used in electronics workshops for their durability and high-performance static dissipation properties.
Tip:
Every electronics engineer must work in an ESD-safe environment to prevent potential damage to sensitive components. Using ESD mats and wrist straps is a basic but crucial step in safeguarding both the components and the integrity of the work process.
2. Component Storage and Organization Tools
Purpose:
Efficient component storage and organization tools are essential for keeping small electronic parts readily accessible and well-organized during PCBA assembly and maintenance. Proper organization saves time, prevents part loss, and improves workflow efficiency.
Types:
Component Bins: Small, stackable bins allow for easy categorization and access to individual components. Ideal for separating parts by type or size.
Drawers: Drawers with dividers help store various components, making them easy to find while keeping the workspace tidy.
Organizers: Multi-compartment organizers can store a range of parts in an orderly manner, helping to avoid mix-ups and ensuring that parts are immediately available when needed.
Examples:
Akro-Mils 44 Drawer: A compact and versatile organizer with clear plastic drawers, ideal for storing small parts like resistors, capacitors, and ICs.
Stack-On 22-Drawer Organizer: A larger, durable unit that provides ample space for organizing various components in a well-structured system.
Tip:
Labeling and categorizing components are essential practices for keeping an organized workspace. Clearly mark each drawer or bin with the component type or part number, and consider color-coding to make parts easier to locate. Using a consistent system of storage and labeling will save valuable time during assembly and troubleshooting.
These special tools—ESD mats and straps for static protection, and component storage tools for organization—are vital for maintaining an efficient, safe, and productive electronics assembly environment. Ensuring both proper handling and systematic storage helps prevent costly errors and enhances overall workflow.
Choosing the Right PCBA Tools for Your Work Environment
1. Budgeting for Quality Tools
Cost vs. Performance:
When selecting PCBA tools, balancing cost with performance is crucial. While it may be tempting to opt for the least expensive option, cheap tools often lack the precision, durability, or features needed for high-quality assembly and testing. On the other hand, high-end tools provide better performance, but they also come with a higher price tag. The key is to choose tools that fit your needs without compromising on quality.
For essential tools like soldering irons, multimeters, or oscilloscopes, consider their expected usage frequency and the type of projects you'll be working on. High-volume production might justify investing in premium models, while for occasional use, mid-range options can offer sufficient quality without overstretching the budget.
Tip:
Invest in high-end tools when consistent accuracy, reliability, and durability are crucial—such as for reflow ovens, oscilloscopes, or pick and place machines in larger production environments. Mid-range models are often ideal for prototyping, small batches, or occasional use, where cost efficiency matters more than long-term, high-volume use.
Example:
Low-Cost Soldering Iron: Basic models like the Weller SP40N are great for simple soldering tasks but may lack advanced temperature control or precision.
Premium Soldering Iron: Models like the Hakko FX888D offer excellent temperature stability, fast heating, and long-lasting durability, making them a better investment for frequent or high-precision soldering work.
2. Tool Maintenance and Calibration
Routine Maintenance:
Regular maintenance of your PCBA tools helps extend their lifespan and ensures consistent performance. This includes cleaning parts, replacing worn-out components (such as tips on soldering irons or probes on multimeters), and checking for any mechanical issues that could affect tool operation. Proper maintenance prevents unnecessary downtime and maintains the quality of your work.
Calibration:
For tools that measure or test components, such as oscilloscopes, multimeters, and reflow ovens, calibration is essential to ensure that measurements are accurate and reliable. Over time, even the best tools can drift out of calibration, which can lead to errors in testing or assembly. Regular calibration checks help you maintain measurement accuracy and avoid costly mistakes in your work.
Tip:
Set up a regular maintenance schedule for all your critical tools. Cleaning and replacing parts should be done periodically, while calibration should be performed according to the manufacturer's recommendations. This ensures the tools continue to operate at peak performance and prevent unexpected failures.
By carefully budgeting for quality tools and maintaining them properly, you can ensure your PCBA tools deliver the best performance while meeting your production needs. Whether you're just starting out or scaling up for high-volume manufacturing, investing in the right tools and maintaining them regularly is essential for achieving reliable, high-quality results.
Conclusion: Investing in the Right Tools for PCBA Excellence
The Top 10 PCBA tools for electronics engineers are essential for ensuring the precision, efficiency, and quality of every PCB assembly. From hand tools like soldering irons and tweezers to automated systems like pick and place machines and AOI for defect detection, each tool plays a vital role in optimizing the assembly process.
Investing in the right tools enhances efficiency, minimizes errors, and ultimately improves the quality of your PCBA. Whether you’re working on prototypes or high-volume production, having the proper tools ensures accurate results, faster turnaround times, and less rework.
When building your PCBA toolkit, it's important to balance cost with performance based on your specific needs. A combination of reliable hand tools for smaller tasks and advanced automated systems for large-scale production will give you the flexibility and precision required for diverse tasks. Regular maintenance and calibration are also key to ensuring your tools stay in top condition for long-term use.
If you have any questions or need more information about PCB and PCBA, don’t hesitate to reach out to PCBMASTER. As a trusted PCB and PCBA supplier, we’re here to offer expert advice and support tailored to your needs.
FAQs
1. What is the Most Important Tool for a Beginner in PCBA?
For a beginner in PCBA (Printed Circuit Board Assembly), the most important tools are soldering irons, tweezers, and multimeters. These tools form the foundation of any PCBA setup and are essential for basic tasks like component placement, soldering, and circuit testing.
Soldering Iron: This is the primary tool for attaching components to the PCB using solder. It’s critical for beginners to learn how to use a soldering iron effectively, as proper soldering techniques ensure strong, reliable connections.
Tweezers: Tweezers are used for precise handling of small components, especially SMDs (Surface-Mount Devices). Being able to handle small parts without damaging them is crucial for building accurate and functional PCBs.
Multimeter: A multimeter is used for testing voltages, resistance, and continuity across the PCB, which is essential for debugging and ensuring your circuit is functioning correctly.
Starting with these basic tools will give you the hands-on experience needed to advance in PCBA.
2. Can I Use a Regular Soldering Iron for PCBA Assembly?
While you can use a regular soldering iron for PCBA assembly, it’s not the ideal tool. Regular soldering irons tend to have less precise temperature control, which can be problematic when working with sensitive electronic components.
Specialized PCBA soldering irons offer better temperature regulation, faster heating times, and more control over the soldering process. These irons often feature:
Adjustable temperature control, essential for avoiding overheating delicate components.
Fine-tipped tips for precise soldering of small, fine-pitch components.
Higher wattage for maintaining a stable temperature during prolonged use.
So, while a regular soldering iron may suffice for basic tasks, a specialized soldering iron is recommended for higher precision and long-term reliability in PCBA assembly.
3. How Often Should I Calibrate My Testing Tools for Accurate Measurements?
To ensure accurate measurements and reliable testing results, calibration of tools like multimeters and oscilloscopes is crucial. The frequency of calibration depends on how often the tools are used and the precision required for your work.
Multimeters: Generally, you should calibrate them every 6 to 12 months or after significant use. If the multimeter is used heavily in high-accuracy applications, more frequent calibration may be necessary.
Oscilloscopes: These should also be calibrated at least once a year, especially if they are used in critical, high-precision tasks like analyzing high-frequency signals.
Best Practices for Tool Calibration:
Follow the manufacturer’s guidelines for calibration frequency.
Regularly check for signs of drift in tool measurements, which can indicate that calibration is needed sooner.
Use calibration standards or certified calibration equipment to ensure the accuracy of your tools.
Regular calibration ensures your tools remain precise, preventing costly mistakes in your PCBA assembly or testing processes.
4. What’s the Difference Between Manual and Automatic Pick-and-Place Machines?
Manual pick-and-place machines and automatic pick-and-place machines differ primarily in their efficiency, cost, and capabilities.
Manual Pick-and-Place Machines:
Cost: Typically much more affordable, making them ideal for small-scale production or prototyping.
Efficiency: Slower and more labor-intensive, requiring the operator to pick and place each component individually.
Capabilities: Manual machines are limited in speed and precision compared to their automatic counterparts.
Automatic Pick-and-Place Machines:
Cost: These are much more expensive due to the automation technology and advanced features.
Efficiency: They offer much faster placement, increasing throughput and reducing human error in high-volume production.
Capabilities: Automatic machines can handle complex component placement, SMDs, and even components with different sizes and shapes. They offer higher accuracy and can run 24/7 with minimal human intervention.
Summary: Manual machines are cost-effective for low-volume or hobbyist work, while automatic machines are more suited for large-scale production due to their speed and precision.
5. Why is ESD Protection Critical in PCB Assembly?
Electrostatic Discharge (ESD) can cause significant damage to electronic components, particularly semiconductors and integrated circuits. Even a small static discharge can destroy or degrade components, leading to unreliable circuit performance or complete failure.
How ESD Protection Helps:
ESD Mats: Grounded mats dissipate static charge from components during assembly and prevent static buildup.
ESD Wrist Straps: Worn by engineers, these straps discharge any static accumulated on the body, protecting the components being worked on.
Ionizers: These devices neutralize airborne static charges in the environment, providing additional protection when handling sensitive parts.
Why It’s Important: Ensuring an ESD-safe environment is critical because static discharge can be invisible and quick, making it nearly impossible to detect until the damage is done. Using ESD tools such as wrist straps and mats is a simple yet vital step in PCB assembly to ensure the longevity and reliability of the components.

