Everything You Need to Know About Printed Circuit Board Labels
In the complex world of electronics manufacturing, even small details can have a significant impact. Printed circuit board labels might seem minor, but they are essential for ensuring traceability, safety, and efficiency throughout the production process. From identifying components to supporting automated assembly and meeting regulatory standards, these labels play a key role in maintaining quality and reliability across every circuit.
Introduction to Printed Circuit Board Labels
Definition and Purpose
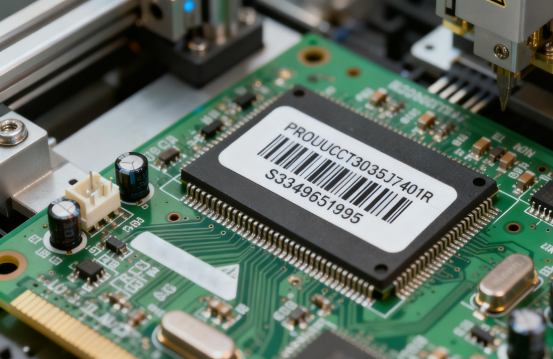
Printed circuit board (PCB) labels are adhesive markers applied directly to PCBs or their components to provide important information about the board or its manufacturing process. They serve as a visible reference for manufacturers, assemblers, quality inspectors, and end-users.
The primary purposes of PCB labels include:
Identification: Labels display part numbers, serial numbers, or manufacturer codes, making it easy to distinguish boards and components.
Traceability: Labels help track each PCB through the production and supply chain, linking it to a specific batch or manufacturing date.
Safety: Labels can indicate potential hazards, such as high voltage areas or electrostatic-sensitive components, helping prevent damage or accidents.
Compliance: Regulatory or industry standards, such as RoHS or IPC guidelines, often require specific markings for certified PCBs.
Example: A PCB used in automotive electronics may include a label showing its lot number, manufacturing date, and UL compliance code. This allows manufacturers to trace any defective batch quickly and comply with safety regulations.
Importance in Electronics Manufacturing
PCB labels are more than just visual markers—they are essential tools in modern electronics production. Their roles span several critical areas:
Inventory Management: Labels enable easy identification of boards in storage, preventing mix-ups and ensuring the correct parts are used in assembly.
Assembly Guidance: Automated production lines and human assemblers rely on labels to correctly position components, read batch codes, or follow assembly instructions.
Quality Control: Labels allow inspectors to verify that boards meet specifications, track manufacturing defects, and manage warranty claims.
Example: In a smartphone production line, a PCB label with a QR code can be scanned to instantly retrieve manufacturing data, ensuring each board meets quality standards before it moves to the next assembly stage.
Types of Printed Circuit Board Labels
Material-Based Types
PCB labels are made from various materials, each chosen for durability, flexibility, and environmental resistance. Common options include:
Polyimide (PI) Labels: Highly heat-resistant, flexible, and suitable for high-temperature soldering. Ideal for automotive, aerospace, and industrial PCBs.
Polyester (PET) Labels: Durable and chemically resistant, widely used for general-purpose PCBs.
Vinyl Labels: Flexible and cost-effective, but lower heat resistance; suitable for low-temperature applications.
Paper-Based Labels: Least expensive, used for temporary identification or indoor storage.
Comparison Example: A polyimide label can withstand soldering temperatures up to 260°C, while a standard vinyl label may start degrading at 80–100°C. This affects selection for high-temperature assembly lines.
Adhesive Types
The adhesive layer determines how well the label sticks to the PCB under various conditions:
Permanent Adhesive: Designed to stay in place indefinitely; suitable for critical traceability labels.
Removable Adhesive: Can be peeled off without leaving residue; useful for temporary identification or testing.
Repositionable Adhesive: Allows minor adjustments during application without losing adhesion.
Step-by-Step Tip: For high-temperature PCBs, combine polyimide material with permanent adhesive to ensure the label remains intact during soldering.
Label Formats
PCB labels come in several formats to accommodate different production needs:
Pre-Printed Labels: Include part numbers, logos, or regulatory marks, ready for direct application.
Blank Printable Labels: Can be customized with barcodes, QR codes, or serial numbers using in-house printers.
Serialized Labels: Assign unique codes to each board for detailed traceability.
Barcoded and QR Code Labels: Facilitate automated scanning and inventory tracking.
Example: A factory producing medical devices may use serialized QR code labels on each PCB to trace it from production to end-user, ensuring compliance with FDA regulations.
Specialized Labels
Some PCBs require labels with extra capabilities for demanding environments:
High-Temperature Labels: Polyimide-based, can withstand multiple reflow cycles during soldering.
Anti-Static Labels: Prevent electrostatic discharge (ESD) damage in sensitive circuits.
Conductive Labels: Sometimes used in grounding or shielding applications.
Use Case Example: Automotive control module PCBs often use high-temperature, anti-static labels to survive engine bay conditions without peeling or degrading.
Design Considerations for PCB Labels
Size and Placement
The size and placement of PCB labels are critical for both human readability and automated assembly. Labels should be large enough to display all required information clearly but small enough not to interfere with components or soldering pads.
Guidelines:
Label width should generally be at least 5–10 mm for text legibility.
Avoid placing labels over critical components, vias, or heat-sensitive areas.
Maintain a margin of 1–2 mm from board edges to prevent peeling.
Examples of Optimal Placement:
Place labels on flat, unobstructed areas near the PCB edge for easy scanning and visibility.
Avoid high-heat zones like near power ICs or soldering points.
For multilayer boards, labels can be placed on the top layer or on non-critical areas of inner layers if accessible.
Print Content
The information printed on a PCB label must be clear, standardized, and relevant to manufacturing, tracking, and compliance.
Common Label Information:
Part number or SKU
Lot or batch number
Manufacturing date code
Manufacturer or supplier information
Regulatory or certification marks (e.g., UL, RoHS)
Step-by-Step: Creating a Readable Label Layout:
1. Prioritize essential information first (e.g., part number and lot code).
2. Use legible fonts (minimum 4–5 pt for small boards) and avoid overly condensed text.
3. Group related information logically: manufacturer info in one section, tracking codes in another.
4. Include machine-readable codes (barcode or QR) alongside human-readable text.
5. Verify compliance with IPC and industry labeling standards.
Example: On a 50 mm × 50 mm PCB, a 10 mm × 15 mm label can accommodate a part number, lot code, and a small QR code without overlapping components.
Color and Contrast
Choosing the right color and contrast is crucial for visibility and automated scanning. Poor contrast can result in reading errors or misidentification during assembly.
Best Practices:
Use high-contrast combinations: black text on white or yellow labels, white text on dark backgrounds.
Avoid colors that blend with the PCB surface (e.g., green text on a green board).
Consider reflective properties; matte labels reduce glare for optical scanning.
Comparison Example:
Light-colored PCBs (e.g., FR4 with natural beige) perform well with black or dark-colored labels.
Dark PCBs (e.g., black or dark green) require white or bright-colored labels to ensure visibility for both operators and machines.
Encoding Methods
Barcodes, QR codes, and Data Matrix codes are essential for automated tracking and manufacturing efficiency.
Key Points:
Barcodes: Best for simple tracking, part numbers, or batch identification.
QR Codes: Can store more information, such as URLs, manufacturing data, or detailed part specifications.
Data Matrix Codes: Ideal for small PCBs due to compact size and high-density storage.
When to Use Each Type:
Use barcodes for straightforward inventory and assembly scanning.
Use QR codes for linking boards to digital documentation or IoT tracking systems.
Use Data Matrix codes when space is limited but full traceability is required.
Example: In an automotive ECU PCB, a 6 mm × 6 mm Data Matrix code can encode the serial number, batch number, and production date in a single compact label without interfering with nearby components.
Manufacturing and Application Process
Label Printing Techniques
The printing method affects the durability, clarity, and usability of PCB labels. Choosing the right technique ensures labels survive manufacturing processes like soldering and assembly.
Common Printing Methods:
Thermal Transfer Printing: Uses heat to transfer ink from a ribbon to the label; highly durable and resistant to smudging.
Laser Printing: Produces precise, high-resolution images; ideal for small fonts or fine codes.
Inkjet Printing: Flexible for low-volume or customized labels; may require protective coating for durability.
Comparison Example:
Thermal transfer labels withstand reflow soldering temperatures up to 260°C, whereas inkjet-printed labels may fade if exposed to high heat.
Laser printing provides higher resolution for tiny barcodes on compact PCBs, ensuring accurate automated scanning.
Application Methods
Applying PCB labels correctly is essential for readability and adhesion. Improper placement can lead to peeling, misalignment, or unreadable codes.
Application Options:
1. Manual Application: Suitable for small batches; requires careful alignment and pressure.
2. Automated Label Placement: Ideal for high-volume production; machines ensure consistent placement and orientation.
Step-by-Step Manual Application:
1. Clean the PCB surface to remove dust, oils, or residues.
2. Align the label using board edges or fiducials as guides.
3. Press firmly from the center outward to remove air bubbles.
4. Inspect label for wrinkles, peeling, or misalignment.
Example: In a production run of 1,000 IoT device PCBs, automated label placement reduces human error and ensures all QR codes are perfectly aligned for scanning.
Quality Control
Ensuring that PCB labels remain readable and correctly applied is crucial for traceability and regulatory compliance.
Inspection Methods:
Visual Inspection: Basic check for alignment, readability, and defects.
Machine Verification: Barcode or QR code scanners verify data accuracy and readability.
Environmental Testing: Confirm labels withstand heat, humidity, and chemical exposure if required.
Common Defects to Watch For:
Misaligned labels covering pads or traces.
Peeling or lifting edges due to insufficient adhesion.
Faded printing or smudged codes affecting readability.
Example: A manufacturer performing a final inspection with a barcode scanner can immediately identify any mislabeled PCBs, preventing faulty boards from moving to assembly.
Regulatory and Compliance Requirements
Industry Standards
Printed circuit board labels play an important role in helping manufacturers meet industry regulations and standards. Common standards include:
IPC-7351: Provides guidelines for PCB land patterns and component identification, ensuring labels support proper assembly and traceability.
UL Marking: Labels indicate compliance with safety standards for electrical components and materials.
RoHS/REACH Compliance: Labels help document that the PCB meets environmental regulations limiting hazardous substances.
How Labels Support Compliance:
Clearly display certification marks or regulatory information.
Ensure traceable documentation for audits and inspections.
Facilitate automated verification of compliance during production.
Example: A UL-certified PCB may include a label with the UL mark, part number, and manufacturing date, enabling both the manufacturer and regulatory inspectors to verify compliance instantly.
Traceability Requirements
Traceability is a critical function of PCB labels, allowing every board to be tracked through its lifecycle.
Roles of Labels in Traceability:
Display batch or lot numbers to link boards to a specific production run.
Include serial numbers to track individual boards for warranty or recall purposes.
Provide machine-readable codes (barcode or QR) for automated data capture.
Case Example:
In automotive electronics, each ECU PCB may carry a Data Matrix code containing its serial number, production date, and assembly line information. If a fault is discovered, engineers can trace all affected boards back to the specific batch, reducing risk and recall costs. Similarly, medical device PCBs use labels to maintain full regulatory traceability for FDA inspections.
Safety and Warning Labels
Safety labels on PCBs communicate potential hazards to both assembly personnel and end-users.
Common Types of Safety Labels:
ESD Warnings: Indicate that components are sensitive to electrostatic discharge.
High-Voltage Indicators: Highlight areas on the board carrying dangerous voltages.
Other Cautionary Marks: Indicate thermal risks or fragile components.
Step-by-Step Guidelines for Placement and Readability:
1. Position safety labels near the hazard area without covering critical components.
2. Use high-contrast colors and clear symbols for instant recognition.
3. Ensure font size and icons meet IPC or industry standards for readability.
4. Verify that labels remain legible after soldering, cleaning, or reflow processes.
Example: A PCB with high-voltage circuits may feature a yellow triangle symbol and “Caution: High Voltage” label near the relevant traces, allowing both workers and automated assembly machines to identify the risk area clearly.
Best Practices and Tips
Choosing the Right Material
Selecting the proper label material ensures durability, adhesion, and readability throughout the PCB’s lifecycle.
Key Considerations:
Operating Environment: High-temperature environments require polyimide labels, while standard conditions may allow polyester or vinyl.
Chemical Exposure: Labels on boards exposed to cleaning solvents or flux should be chemically resistant.
Flexibility Needs: Flexible PCBs (FPCs) require pliable labels that bend without peeling or cracking.
Example: In an LED driver PCB exposed to repeated reflow soldering, polyimide labels with permanent adhesive prevent peeling or fading during high-temperature cycles.
Optimizing Label Design
Well-designed labels improve readability, compliance, and efficiency in assembly lines.
Design Tips:
1. Prioritize essential information (part number, lot number, date code).
2. Use clear, legible fonts; avoid overly condensed text.
3. Incorporate machine-readable codes alongside human-readable text.
4. Ensure proper size and placement to avoid interference with components or traces.
Example: A 10 mm × 15 mm label on a 50 mm × 50 mm PCB can contain a part number, QR code, and lot number without covering critical components, balancing readability and functionality.
Storage and Handling
Proper storage preserves label quality before application.
Best Practices:
Store labels in a cool, dry environment to prevent adhesive degradation.
Keep labels in original rolls or sheets to avoid curling or damage.
Handle labels with clean hands or gloves to prevent contamination.
Example: Labels stored at room temperature in a sealed container maintain adhesion for months, whereas exposure to high humidity can reduce stickiness and cause peeling during application.
Cost and Efficiency Considerations
Balancing cost, quality, and efficiency is critical when selecting labels for mass production.
Tips:
Use standard polyester or vinyl labels for low-cost, non-critical PCBs.
Reserve high-performance polyimide or specialty labels for boards exposed to high heat, chemicals, or regulatory scrutiny.
Evaluate automated labeling for large production runs to reduce labor costs and human error.
Example: Switching to automated placement of polyimide labels in a 10,000-unit production run improved efficiency by 40% while ensuring all labels were correctly aligned and readable.
Future Trends in PCB Labeling
Smart Labels
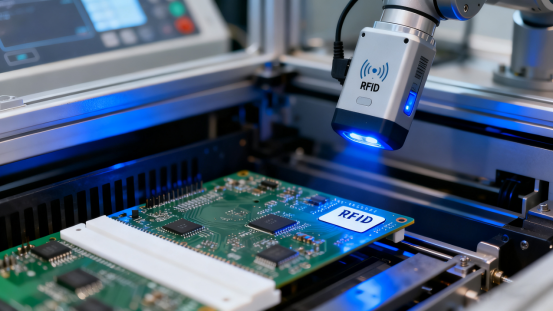
Smart PCB labels are embedded with technology such as RFID (Radio-Frequency Identification) or NFC (Near Field Communication) to enable automated tracking and data retrieval throughout the PCB lifecycle.
Key Points:
RFID labels allow wireless scanning without direct line-of-sight, improving inventory management and assembly efficiency.
NFC labels enable quick access to manufacturing data or maintenance history using mobile devices or specialized scanners.
Example: In a high-volume server PCB production line, RFID-enabled labels track each board from assembly to testing, automatically updating inventory and maintenance records without manual input.
Eco-Friendly Materials
As sustainability becomes increasingly important, PCB labels are being developed with biodegradable, recyclable, or low-impact materials.
Benefits:
Reduces environmental impact of electronic waste.
Complies with emerging green regulations and corporate sustainability goals.
Can still meet durability and readability requirements for industrial use.
Example: Some manufacturers now use bio-polyester labels that decompose after disposal, while maintaining adhesion and print quality during the PCB’s operational life.
Integration with Digital Manufacturing
Modern PCB labeling is increasingly integrated with Industry 4.0 and IoT-enabled assembly lines to streamline production and improve traceability.
Key Uses:
Labels encoded with digital information are automatically read by machines, linking each PCB to its digital production record.
Enables predictive maintenance by tracking board performance and lifecycle data.
Supports automated assembly verification and error detection.
Example: A smart factory producing automotive PCBs can use digitally encoded labels to automatically route boards through testing stations, ensuring each board meets specifications before moving to final assembly.
Conclusion
Printed circuit board labels play a vital role in electronics manufacturing by ensuring identification, traceability, safety, and compliance. Choosing the right type of label—from high-temperature polyimide to polyester or vinyl—combined with careful design of size, placement, color contrast, and encoding methods, ensures readability for both humans and automated systems. Following best practices in application, quality control, and adherence to industry standards helps maintain reliability throughout the PCB lifecycle.
For engineers and manufacturers, it is important to consider environmental conditions, production volume, and regulatory requirements when selecting labels. Using durable materials, high-contrast designs, and machine-readable codes can improve efficiency, reduce errors, and support automated tracking. Staying aware of emerging trends such as smart, RFID-enabled, or eco-friendly labels can also enhance production capabilities and sustainability.
If you have questions or want to learn more about PCBs, feel free to contact PCBMASTER. As an experienced PCB supplier, we provide professional guidance and solutions to help optimize your PCB labeling and manufacturing processes.
FAQs
What materials are most durable for PCB labels in high-temperature environments?
The most durable materials for high-temperature PCB environments are polyimide (PI) labels. They can withstand soldering and reflow temperatures up to 260°C without peeling, fading, or losing adhesion. For less demanding applications, polyester (PET) labels can also be used, but they have lower heat resistance and may degrade under extreme temperatures. Choosing the right material ensures labels remain intact throughout the PCB’s lifecycle.
How do I ensure my PCB labels are readable by automated assembly machines?
To ensure readability by automated systems:
Use machine-readable codes such as barcodes, QR codes, or Data Matrix codes.
Place labels on flat, unobstructed areas of the PCB, avoiding components, vias, or solder pads.
Maintain high contrast between the text or code and the label background (e.g., black on white or white on dark green/black PCBs).
Ensure labels are printed with high-resolution methods like thermal transfer or laser printing to prevent scanning errors.
Can a PCB label affect circuit performance or reliability?
If improperly chosen or applied, a PCB label can affect reliability. For example:
Labels placed over solder pads, vias, or heat-sensitive components can interfere with assembly or heat dissipation.
Labels made from materials with poor thermal resistance may peel or degrade during reflow soldering, potentially contaminating the board.
By selecting suitable materials, proper adhesives, and correct placement, PCB labels will not affect circuit performance.
What is the difference between permanent and removable adhesives for PCB labels
Permanent adhesives are designed to stay affixed indefinitely, even under high temperatures or chemical exposure. They are ideal for traceability and compliance labels that must remain throughout the PCB lifecycle.
Removable adhesives can be peeled off without leaving residue and are suitable for temporary identification or testing purposes.
Choosing between them depends on whether the label needs to remain on the PCB permanently or only during a specific stage of production.
How do I choose the right barcode or QR code type for PCB traceability
Barcodes are suitable for simple identification, like part numbers or batch codes.
QR codes can store more information, such as URLs, production details, or maintenance data, and can be scanned quickly by mobile devices.
Data Matrix codes are ideal for compact PCBs where space is limited but high-density data storage is required.
Select the code type based on data size, available label space, and scanning requirements in your assembly or inventory process.
