Printed Circuit Board Etching Kit Guide: Tools, Materials & Safety Tips
Turning a blank copper board into a functioning circuit has a certain magic to it — precision, patience, and a bit of chemistry all working together. With the right printed circuit board etching kit, that process becomes accessible even to beginners, allowing anyone to create professional-quality prototypes from home or workshop. Mastering the right tools and materials, and knowing how to handle them safely, is what separates a clean, reliable etch from a failed one. The journey starts with understanding how each part of the kit contributes to a perfect PCB.
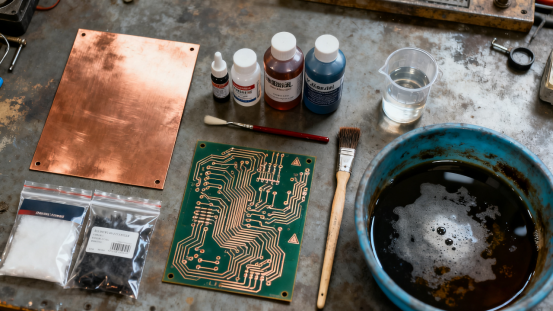
Introduction to Printed Circuit Board Etching Kits
What Is PCB Etching?
PCB etching is the process of chemically removing unwanted copper from a copper-clad board to form the conductive pathways of a printed circuit board (PCB). The goal is to leave only the copper traces that connect electronic components, while dissolving the rest.
In practical terms, etching is one of the core stages of PCB fabrication, following the design and transfer of the circuit pattern. Once the layout has been applied to the copper surface—using a photoresist or toner mask—the board is submerged in an etching solution such as ferric chloride or ammonium persulfate. The exposed copper reacts with the solution and is gradually dissolved, leaving behind a clean, well-defined circuit pattern.
Etching differs from other PCB manufacturing methods like milling or plating.
Milling uses a mechanical cutting tool to carve away copper, making it more suitable for single prototypes or quick mechanical tests.
Plating, on the other hand, adds layers of copper through electrochemical deposition, often used for multilayer or plated-through-hole boards.
Compared to these techniques, chemical etching is more accessible, affordable, and capable of producing fine trace details with relatively simple equipment.
Why Use a PCB Etching Kit?
A PCB etching kit provides all the tools, chemicals, and safety gear needed to perform the etching process at home, in a lab, or in a small workshop. It’s an ideal choice for those who want to turn circuit ideas into working prototypes quickly and efficiently.
For hobbyists and students, these kits offer hands-on experience in PCB production without the need for expensive machinery. Beginners can learn how circuits are physically made, from schematic to real hardware, building a deeper understanding of electronics.
For engineers and makers, etching kits allow rapid prototyping and design iteration. Instead of waiting for a fabrication service, users can create and test boards on the same day, reducing project turnaround time.
From a cost perspective, a one-time investment in a PCB etching kit is often cheaper than outsourcing small-batch or single-unit PCB runs—especially during early design phases. Etching at home is also more flexible: you can adjust trace widths, experiment with layouts, and test new materials immediately.
Typical applications include:
Prototyping new circuit designs.
Repairing or replacing damaged PCBs in electronics.
DIY electronics projects, such as custom sensors, amplifiers, or Arduino shields.
In short, a printed circuit board etching kit bridges the gap between concept and creation—empowering users to build precise, functional circuits without industrial equipment.
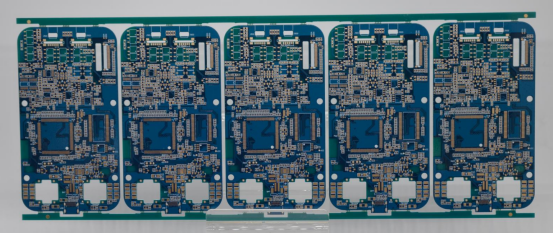
Essential Components of a PCB Etching Kit
Chemicals and Solutions
At the core of every PCB etching kit are the etching chemicals that remove unwanted copper from the board. The three most common etchants are Ferric Chloride (FeCl₃), Ammonium Persulfate (NH₄)₂S₂O₈, and Cupric Chloride (CuCl₂). Each has different performance, safety, and disposal characteristics.
1. Ferric Chloride – The most widely used etchant.
Effectiveness: Fast and reliable, ideal for both beginners and professionals.
Drawback: Produces dark stains and requires careful disposal.
Best use: Small-scale or educational projects.
2. Ammonium Persulfate – A clear solution suitable for visual monitoring.
Effectiveness: Provides consistent results with less residue.
Drawback: Sensitive to temperature; requires heating to around 50°C.
Best use: Users who prefer visibility and cleaner results.
3. Cupric Chloride – A regenerative etchant that can be reused.
Effectiveness: Environmentally friendlier option; maintains stable performance when aerated.
Drawback: Needs regular maintenance and pH monitoring.
Best use: Long-term or high-volume etching operations.
Etchant | Speed | Reusability | Disposal Safety | Visibility | Difficulty |
|---|---|---|---|---|---|
Ferric Chloride | Fast | Low | Moderate | Opaque | Easy |
Ammonium Persulfate | Medium | Low | Easier | Clear | Medium |
Cupric Chloride | Medium | High | Eco-friendly | Green Tint | Advanced |
Safe Handling and Mixing Tips:
Always add etchant to water, never the reverse, to prevent splashing.
Use non-metallic containers to avoid unwanted chemical reactions.
Store chemicals in clearly labeled, sealed containers away from heat or direct sunlight.
Maintain proper ventilation when mixing or using etchants to avoid inhaling fumes.
Etching Tank and Heating Equipment
The etching tank is where the actual copper removal occurs. Its design and temperature control directly influence the quality and precision of the etched PCB.
Role of Temperature and Agitation:
Etching reactions are faster and cleaner at higher temperatures, typically between 40°C and 55°C, depending on the solution used.
Agitation, or gentle movement of the etchant, ensures even exposure of the copper surface, preventing “over-etched” or patchy areas.
Consistent temperature and flow produce smooth, well-defined circuit lines.
Manual vs. Automated Etching Tanks:
Manual tanks are simple containers—ideal for hobbyists who stir or move the board by hand.
Automated tanks include heaters, air pumps, or bubble systems for consistent agitation and temperature. These are preferred in laboratories or frequent-use environments.
Recommended Materials for Durability:
Glass and polypropylene (PP) are the most common tank materials.
Glass provides excellent visibility for monitoring progress.
Polypropylene offers superior chemical resistance and is lightweight, making it a durable long-term option.
Tip: Avoid using metal containers or components, as they can react with etchants and contaminate the solution.
Protective Gear and Safety Equipment
Safety is a non-negotiable part of PCB etching. The chemicals used are corrosive and can cause harm if mishandled. Proper personal protective equipment (PPE) and workspace setup are essential for safe operation.
Required PPE:
Chemical-resistant gloves (nitrile or neoprene) to protect your hands.
Safety goggles to prevent eye irritation or injury from splashes.
Respirator masks if working with fumes or poor ventilation conditions.
Ventilation and Workspace Setup:
Always work in a well-ventilated area or under a fume hood.
Keep your workspace clean and free from clutter, especially food or personal items.
Place all chemicals on a stable, non-porous surface that can be easily cleaned.
Emergency Spill Response Tools:
Have neutralizing agents such as baking soda or sodium carbonate ready to neutralize acid spills.
Use absorbent materials like paper towels or chemical spill pads for quick cleanup.
Keep running water or an eyewash station nearby for immediate rinsing if contact occurs.
Following these safety measures not only protects the user but also extends the lifespan of your tools and maintains a safe, efficient etching environment.
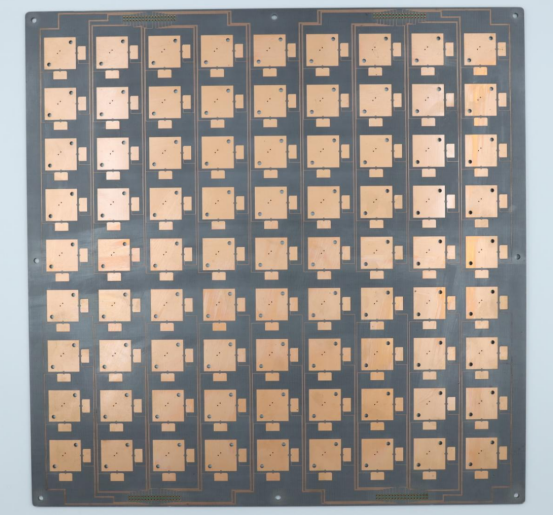
Step-by-Step PCB Etching Process
The PCB etching process transforms a plain copper-clad board into a functional printed circuit board by selectively removing unwanted copper. Each stage — from preparation to finishing — affects the precision and reliability of the final circuit.
Preparing the Copper-Clad Board
Cleaning and Degreasing Methods
Before etching, the copper-clad board must be perfectly clean. Any dirt, grease, or oxidation can cause incomplete etching or poor adhesion of the circuit pattern.
Use fine abrasive pads or steel wool to remove oxidation and roughen the surface slightly.
Rinse the board with isopropyl alcohol (IPA) or acetone to dissolve grease and residue.
Avoid touching the copper surface with bare hands afterward; skin oils can create invisible contamination.
Transferring the Circuit Design
Once clean, the next step is to transfer the circuit layout onto the board. This layer protects the copper traces that should remain intact during etching. Common transfer methods include:
1. Photoresist Method – A UV-sensitive film or spray is applied to the board, exposed through a printed mask, and then developed. Suitable for fine-pitch or high-density designs.
2. Toner Transfer Method – A printed circuit pattern is transferred using heat and pressure from a laser printer.
3. Direct Draw Method – Circuit lines are drawn directly using an etch-resistant permanent marker or specialized pen for quick prototypes.
Example: Toner Transfer Using a Laser Printer
1. Print your PCB layout in mirror image on glossy magazine paper or transfer film.
2. Place the printed side against the cleaned copper board.
3. Apply heat and pressure with a household iron (about 150–180°C) for 3–5 minutes.
4. Let the board cool, then soak it in warm water to remove the paper.
5. The toner will remain on the copper, forming the resist pattern that protects traces during etching.
This simple method is reliable for most DIY and prototype PCB projects, producing sharp, well-defined traces when done correctly.
Performing the Etching
Safe Etching Procedure
1. Pour the etching solution (e.g., ferric chloride or ammonium persulfate) into the tank or tray.
2. Warm the solution to the recommended temperature, usually 40°C to 50°C.
3. Submerge the board with the printed resist side facing up.
4. Gently agitate or move the etchant to ensure even copper removal.
5. Monitor the board every few minutes; etching typically takes 10–30 minutes depending on the solution and temperature.
Monitoring Progress and Completion
Etching is complete when all exposed copper areas are gone, leaving only the protected traces.
Check visually under bright light; the unetched traces should have a clean, shiny copper color.
If some areas remain partially etched, return the board to the solution for a short additional period.
Common Mistakes and How to Avoid Them
Over-etching: Leaving the board too long can erode fine traces. Prevent this by checking progress regularly.
Under-etching: Removing the board too soon can leave unwanted copper bridges. Extend etching slightly and ensure adequate agitation.
Uneven Etching: Usually caused by stagnant solution or contamination. Stir gently and make sure the board is fully submerged.
By maintaining temperature and movement consistency, you ensure precise copper removal and clean circuit lines.
Post-Etching Finishing
Rinsing and Resist Removal
After etching, rinse the board thoroughly with distilled water to stop the chemical reaction.
Remove the resist layer using acetone or a resist remover.
Dry the board with lint-free cloth or compressed air to prevent oxidation spots.
Optional Tin Plating or Solder Masking
To improve solderability and protect copper traces:
Apply a thin layer of tin plating solution or liquid solder mask.
Tin prevents corrosion and makes solder joints more reliable.
Solder masks help define pads and prevent solder bridges during component soldering.
Final Inspection for Circuit Continuity
Before soldering components:
Use a multimeter to check continuity along all traces.
Inspect for shorts between adjacent tracks and open circuits in signal paths.
Minor defects can be corrected with fine wires or solder bridges.
Completing these finishing steps ensures a professional-quality PCB with long-lasting electrical performance and minimal rework.
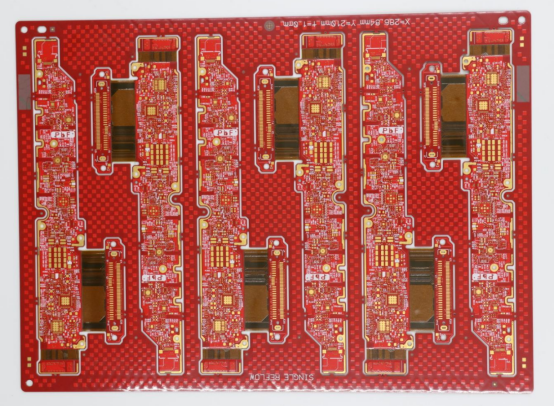
Choosing the Right PCB Etching Kit
Selecting the right printed circuit board etching kit depends on your project needs, skill level, and workspace setup. The ideal kit should match your desired board size, frequency of use, and material compatibility while ensuring safety and cost efficiency.
Factors to Consider
1. PCB Size and Complexity
The size and layout of your PCB directly influence the type of etching kit you need.
Small or simple boards (e.g., Arduino shields, sensor modules) can be handled by compact kits with manual tanks.
Larger or complex designs with dense traces benefit from kits that include heated tanks and precise temperature control.
For double-sided PCBs, ensure your kit supports uniform etching and alignment for both sides, as uneven copper removal can cause connectivity issues.
2. Frequency of Use
Your etching habits also determine the ideal setup.
Occasional users or hobbyists may prefer ready-to-use kits with pre-measured chemicals and minimal maintenance.
Frequent users, such as engineers or labs, often benefit from refillable systems and reusable etchants like cupric chloride, reducing long-term costs.
Choosing a scalable kit helps ensure consistent performance without unnecessary waste or downtime.
3. Compatibility with Board Types
Check whether your etching kit supports single-sided and double-sided copper-clad boards.
Most basic kits work well for single-sided PCBs.
Advanced kits often include double-sided exposure and etching tools, ideal for more professional prototypes.
Also, verify compatibility with FR-1 (paper-based) or FR-4 (fiberglass) board materials depending on your application and desired durability.
Comparison of Popular Etching Kits
When comparing etching kits, consider factors like included chemicals, temperature control, safety features, and overall cost. Below is a simplified comparison of commonly available options:
Brand / Kit | Etchant Type | Includes Tank & Heater | Safety Rating | Approx. Cost (USD) | Best For |
|---|---|---|---|---|---|
MG Chemicals Kit | Ferric Chloride | Manual tank only | ★★★★☆ | $40–$60 | Beginners, hobbyists |
Kinsten Etching Set | Ammonium Persulfate | Heated bubble tank | ★★★★★ | $90–$120 | Intermediate users |
Bungard PCB Kit | Cupric Chloride | Automated tank system | ★★★★★ | $150–$200+ | Professionals, labs |
Examples of Reputable Brands:
MG Chemicals – Reliable and beginner-friendly, easy to find globally.
Kinsten – Known for consistent heating and clean etching results.
Bungard – Offers industrial-grade systems suited for frequent or precision work.
Recommendations:
For beginners, start with MG Chemicals or similar kits using ferric chloride for ease of use and availability.
For advanced users, Kinsten and Bungard systems provide automation, higher precision, and better long-term durability.
When evaluating, balance cost, safety, and quality — a slightly higher investment in better equipment often yields more consistent, professional results.
DIY vs. Pre-Made Etching Kits
Pros and Cons of Assembling Your Own Kit
Creating your own DIY etching kit can save money and offer flexibility. You can select preferred chemicals, containers, and heating elements.
Pros: Lower cost, customizable setup, educational value.
Cons: Requires sourcing materials separately, more setup time, and higher safety responsibility.
Example: Low-Cost DIY Etching Station
A simple DIY setup can include:
1. Plastic or glass container as an etching tank.
2. Aquarium heater or hot water bath to maintain temperature.
3. Air pump or manual stirring for agitation.
4. Ferric chloride or ammonium persulfate as the etchant.
5. Rubber gloves, goggles, and apron for protection.
This setup is ideal for hobbyists or educators who perform occasional etching and want hands-on control of the process.
When It’s Better to Buy a Ready-Made Kit
A pre-assembled etching kit is the better choice when:
Consistent, professional-quality results are required with minimal calibration.
Regular etching of multiple boards is planned, and automated temperature control is preferred.
Minimizing chemical handling and safety risks through sealed systems is important.
In summary, choose a DIY setup for experimentation and learning, but opt for a ready-made kit when precision, speed, and safety are top priorities.
Safety and Environmental Considerations
Working with PCB etching kits involves handling corrosive chemicals and potentially hazardous materials. Observing proper safety and environmental practices ensures both personal protection and responsible chemical management.
Handling and Disposal of Etchants
Proper Storage and Labeling
Store all etching chemicals in clearly labeled, airtight containers to prevent accidental use or spills.
Keep chemicals away from heat, sunlight, or incompatible substances, such as metals or acids.
Separate different types of etchants to avoid unintended reactions.
Safe Neutralization and Disposal Methods
Most etchants can be neutralized before disposal: for example, ferric chloride can be mixed with baking soda or sodium carbonate until the pH is neutral (around 7).
Dispose of neutralized solutions according to local hazardous waste regulations, never pour directly into drains.
Small quantities of ammonium persulfate can often be diluted and slowly neutralized before disposal, but always verify with local environmental authorities.
Eco-Friendly Alternatives and Recycling Copper Solutions
Some etchants, like cupric chloride, can be regenerated and reused multiple times, reducing chemical waste.
Copper removed from the board can be recovered via precipitation or filtration, contributing to environmentally responsible recycling.
Consider bio-etching or low-impact solutions for hobbyist or educational projects to minimize environmental hazards.
Workspace Safety Best Practices
Setting Up a Ventilated and Chemical-Safe Workstation
Work in a well-ventilated room or under a fume hood to reduce exposure to harmful vapors.
Use a non-porous, easy-to-clean work surface to contain spills.
Keep all chemicals, tools, and PPE organized to prevent accidents.
Routine Safety Checks and Maintenance of Equipment
Inspect tanks, heaters, and stirring devices regularly for cracks, corrosion, or leaks.
Check that protective gear such as gloves and goggles remain in good condition.
Replace expired chemicals or degraded materials promptly to maintain safety.
First-Aid Steps for Accidental Exposure
Skin contact: Rinse immediately with plenty of water for at least 15 minutes and remove contaminated clothing.
Eye contact: Use an eyewash station or clean water to flush eyes thoroughly for 15–20 minutes.
Inhalation: Move to fresh air immediately; seek medical attention if irritation persists.
Ingestion: Do not induce vomiting; contact a poison control center or medical professional immediately.
By integrating proper handling, disposal, and workstation practices, you protect yourself, your workspace, and the environment while working with PCB etching kits.
Troubleshooting Common Etching Problems
Even with proper preparation, PCB etching can present challenges. Understanding common problems and their solutions ensures cleaner traces, fewer mistakes, and a higher-quality final board.
Incomplete or Uneven Etching
Causes
Low solution temperature slows the chemical reaction, leaving some copper unetched.
Contaminated etchant with leftover copper or debris can block the etching process.
Poor agitation or stagnant areas in the tank prevent even exposure of the copper surface.
Corrective Actions and Prevention
Maintain recommended temperature (usually 40–55°C) for the etchant.
Replace or filter etchant if it appears dirty or has slowed in performance.
Agitate the solution gently during etching to ensure all areas are evenly exposed.
For larger boards, periodically rotate or reposition the board for uniform etching.
Over-Etching and Track Damage
Signs of Excessive Etching
Copper traces appear thin, jagged, or partially missing.
Small pads or fine lines may break, resulting in open circuits.
Adjusting Etching Time or Solution Strength
Reduce etching duration by checking the board frequently.
Lower etchant concentration slightly if traces are consistently over-etched.
For precise circuits, consider using weaker solution with longer agitation, which offers more control over the process.
Prevention Tips
Always monitor the board visually every few minutes.
Maintain a consistent temperature and movement to avoid localized over-etching.
Poor Transfer or Resist Adhesion
Common Issues
Photoresist film peeling or toner transfer flaking during etching.
Incomplete coverage where traces are partially exposed due to improper adhesion.
Solutions
Ensure the copper surface is thoroughly cleaned and degreased before transfer.
Increase transfer temperature and pressure for toner-based methods.
If the resist fails, reapply the pattern or use an alternative transfer method.
For photoresist films, verify UV exposure and development times match the manufacturer’s recommendations.
Preventive Measures
Avoid touching the copper after cleaning to prevent oils from reducing adhesion.
Test small sections before committing to a full board to confirm resist effectiveness.
By addressing these common etching problems, users can achieve clean, reliable PCB traces, minimize rework, and ensure functional circuits every time. Proper monitoring, consistent procedures, and attention to detail are key to successful DIY or professional etching projects.
Maintenance and Storage of Your Etching Kit
Proper maintenance and storage extend the lifespan of your PCB etching kit, ensure consistent results, and maintain safety in your workspace. Regular care prevents contamination, corrosion, and chemical degradation.
Cleaning After Use
Safe Disposal of Used Chemicals and Rinse Water
After etching, neutralize used chemicals like ferric chloride or ammonium persulfate with baking soda or sodium carbonate before disposal.
Dispose of neutralized solutions according to local hazardous waste regulations; never pour directly into drains.
Rinse used boards with distilled water to prevent residual chemicals from contaminating surfaces or tools.
Cleaning and Drying Tanks and Tools
Wash tanks and stirring tools with warm water and mild detergent to remove chemical residues.
Avoid using metal scrubbing tools that can react with residual etchant.
After washing, thoroughly dry all containers and utensils to prevent corrosion or chemical reactions during storage.
Long-Term Storage Tips
Labeling and Sealing Chemicals
Clearly label all chemical containers with contents, concentration, and date of opening.
Use airtight lids or caps to prevent evaporation, contamination, and accidental spills.
Store chemicals in a cool, dry, and ventilated area, away from heat sources or direct sunlight.
Keeping Tools Rust-Free and Corrosion-Resistant
Rinse and dry all metal tools after cleaning to prevent rust.
Consider coating metal tools with light machine oil or using plastic-coated implements when possible.
Avoid prolonged contact of tools with leftover etchants to reduce corrosion risk.
Recommended Shelf Life for Common Etchants
Ferric Chloride: 6–12 months in sealed containers; degrades slowly over time.
Ammonium Persulfate: 6–8 months; sensitive to humidity and temperature.
Cupric Chloride: Can be regenerated and reused multiple times if properly maintained.
Always check color and performance before reuse; cloudy or slow-reacting solutions should be replaced.
By maintaining clean equipment, properly storing chemicals, and monitoring solution integrity, users ensure consistent PCB etching results, safer handling, and longer-lasting kit components. Regular maintenance is a key factor in achieving professional-quality PCB prototypes every time.
Conclusion
Proper tools, accurate techniques, and strict adherence to safety practices are the foundation of successful PCB etching. Using the right etching kit, protective gear, and workspace setup ensures clean, reliable circuit boards while minimizing risk to yourself and the environment.
Starting with small projects allows beginners and hobbyists to practice precision, build confidence, and gradually take on more complex PCB designs. Attention to detail at every step—from board preparation to post-etching finishing—makes a significant difference in the quality of the final product.
If you have further questions or want to learn more about PCBs and related solutions, feel free to reach out to PCBMASTER, a professional PCB supplier ready to provide expert guidance and support.
FAQs
Question | Answer |
|---|---|
What chemicals are used in a printed circuit board etching kit? | Most kits use Ferric Chloride (FeCl₃) for fast, beginner-friendly etching; Ammonium Persulfate ((NH₄)₂S₂O₈) for clear solution and visual monitoring; or Cupric Chloride (CuCl₂) which is reusable and more eco-friendly. |
How long does it take to etch a PCB using a standard kit? | Etching usually takes 10–30 minutes, depending on etchant type, solution temperature (40–55°C), and board size/complexity. Regular checks prevent over-etching and uneven copper removal. |
Can I reuse etching solution, and how can I tell when it’s expired? | Cupric Chloride can be regenerated and reused; Ferric Chloride and Ammonium Persulfate have limited reuse. Signs of expiration: slower etching, cloudy or discolored solution, and uneven copper removal. |
What safety precautions should I take when handling Ferric Chloride? | Always wear gloves, goggles, and protective clothing. Work in a well-ventilated area, store chemicals in labeled airtight containers, and keep neutralizing agents and water nearby in case of spills. |
Is DIY PCB etching suitable for multi-layer boards? | DIY etching is suitable for single-sided or double-sided PCBs. Multi-layer boards require precise alignment, plated-through holes, and professional equipment, so they are best made by professional PCB fabrication services. |
