


Printed Circuit Board Maintenance: Tips for Cleaning and Choosing a Cleaner

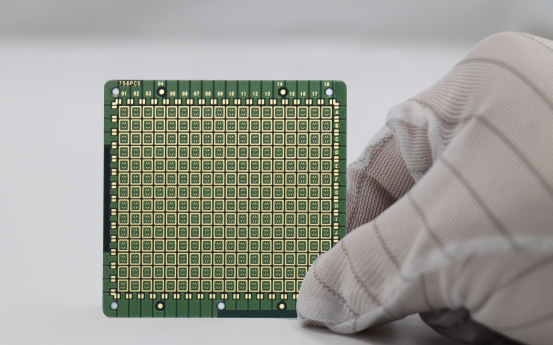
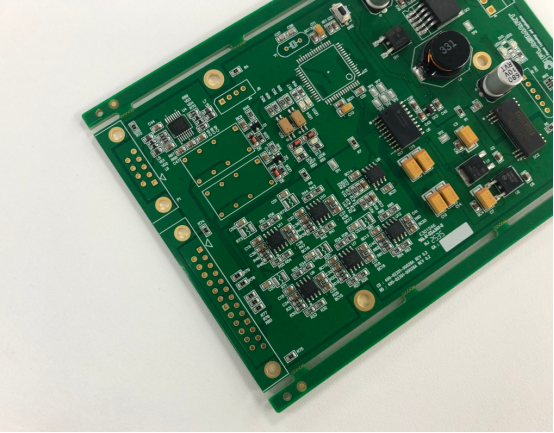
A printed circuit board, or PCB, is the key part that makes electronic devices work. It connects all the important components and allows electricity to flow correctly. If a PCB is dirty or damaged, devices can slow down, stop working, or even fail completely.
So, keeping your PCB clean and properly maintained is very important. Dirt, dust, oil, or leftover solder can block connections, cause short circuits, or reduce performance. Regular cleaning helps your devices run smoothly and last longer.
This article will guide you on cleaning your PCB and choosing the right cleaner. By following these simple tips, you can protect your electronics and make them work better for years.
Why Regular PCB Cleaning Is Important
Keeping your PCB clean is not just about appearance. Regular cleaning protects your electronics, improves performance, and extends their lifespan. Let’s look at the reasons in detail:
1. Prevent Dust, Dirt, and Residue Build-Up
Over time, dust, hair, oil from hands, solder flux, and other small particles can accumulate on a PCB. These tiny particles may seem harmless, but they can:
l Block electrical connections: Dust can settle between solder joints or connectors, preventing proper contact.
l Cause short circuits: Conductive particles or leftover solder can create unwanted connections between traces.
l Interfere with signals: Even a small layer of dirt can change the path of high-frequency signals, leading to errors.
Example: In a home router, accumulated dust on the PCB can reduce Wi-Fi signal strength or cause the device to restart unexpectedly.
2. Improve Device Performance and Stability
A clean PCB allows electricity to flow smoothly through all circuits. When debris blocks paths or creates resistance:
l Devices may heat up more than normal.
l Signals can weaken, causing slower performance or data errors.
l Components may work harder, increasing energy consumption.
Example: In a computer motherboard, cleaning the PCB can prevent crashes, improve USB or HDMI signal quality, and reduce overheating of chips.
3. Extend the Lifespan of Electronics
Residues like oil, flux, or dust can trap moisture and create corrosion over time. Corrosion damages copper traces and solder joints, which may lead to:
l Early component failure
l Permanent short circuits
l Reduced reliability under stress (heat, vibration, or humidity)
Example: In a printer PCB, neglecting cleaning can cause ink or toner particles to build up, eventually damaging the control board and shortening the printer’s life.
Regular cleaning ensures that:
l Components stay free from debris
l Heat dissipation is optimal
l Electrical connections remain strong
When to Clean Your PCB
Knowing when to clean your PCB is just as important as knowing how to clean it. Cleaning too often wastes time and resources, while cleaning too late can cause device problems. Here are the key situations when you should clean your PCB:
1. When Device Performance Declines
If your electronic device starts showing signs of poor performance, it may be time to clean the PCB. Common symptoms include:
l Unstable signals: Connections may be weak due to dust or residue, causing intermittent errors.
l Overheating: Dirt and debris can block heat flow, making components hotter than normal.
l Increased noise: Electrical interference from accumulated particles can cause buzzing, static, or signal loss.
Example: A Wi-Fi router that frequently disconnects or slows down may have dust accumulation on its PCB affecting the circuits.
2. When Environmental Factors Affect the PCB
Certain environments make PCB cleaning more important:
l High dust areas: Workshops, factories, or open-air setups can deposit a lot of dust.
l High humidity or moisture: Water vapor can combine with dirt to create corrosion.
l Chemical exposure: PCB near solvents, cleaning agents, or smoke may collect harmful residues.
Example: In a factory, PCBs inside control panels can accumulate metal dust or oil mist, which can cause shorts if not cleaned regularly.
3. After Long-Term Use
Even in normal conditions, PCBs can gradually accumulate residues over months or years. Signs include:
l Visible dust, dirt, or solder flux on the surface
l Dark stains or discoloration on the board
l Sticky or oily residues near connectors or solder joints
Example: A computer motherboard after several years may have dust under chips and heat sinks, which can reduce airflow and increase the risk of overheating.
PCB Cleaning Steps and Important Safety Tips
Cleaning a PCB is not difficult, but it must be done carefully to avoid damage. Follow these steps to keep your board safe and working well:
1. Turn Off Power and Use Anti-Static Protection
Before touching your PCB, always disconnect the device from power. Electricity can shock you or damage the board.
l Use an anti-static wrist strap or work on an anti-static mat to prevent static electricity from harming sensitive components.
Example: Even a small static shock can destroy a microchip on a computer motherboard.
2. Remove Large Dust and Debris
Start by getting rid of big particles like dust, hair, or crumbs.
l Use a soft brush or compressed air to gently remove these materials.
l Avoid rubbing too hard, which can damage traces or components.
Example: Dust under a fan or near connectors can be blown away carefully before using liquid cleaners.
3. Clean Key Areas with PCB Cleaner
Use a specialized PCB cleaner to clean sensitive parts like:
l Solder joints
l Connectors and ports
l Critical traces and circuits
l Apply the cleaner gently with a soft brush, lint-free cloth, or as directed on the product label.
l Avoid using harsh chemicals that can corrode copper or plastic parts.
Example: PCB cleaner can remove sticky flux residue left after soldering, ensuring reliable connections.
4. Dry the Board and Inspect Carefully
After cleaning:
l Let the PCB air dry completely or use a gentle airflow.
l Check the board visually for leftover liquid, streaks, or damage.
Example: Make sure no liquid remains near IC pins or connectors, as even small drops can cause shorts when the device is powered on.
Safety Tips:
l Always work in a well-ventilated area when using chemical cleaners.
l Wear gloves if recommended by the cleaner’s instructions.
l Never apply water or household cleaners directly to a PCB.
How to Choose the Right PCB Cleaner
Choosing the right cleaner for your PCB is very important. Using the wrong product can damage the board, leave residues, or even cause short circuits. Here’s how to select the right cleaner:
1. Types of PCB Cleaners
There are different forms of PCB cleaners for various needs:
l Spray cleaners: Easy to apply on specific areas; good for light cleaning.
l Liquid cleaners: Can be used with brushes or for immersing small boards; effective for heavy residues.
l Wipe or cloth cleaners: Convenient for surface cleaning and delicate boards.
Different PCB materials require different cleaners:
l FR-4 boards: Most common rigid PCBs; generally compatible with most standard cleaners.
l Flexible boards: Require gentle, low-residue cleaners to avoid damaging thin traces.
Example: A flexible PCB in a smartphone needs a mild cleaner applied with a soft brush, while a rigid PCB in a desktop computer can tolerate a stronger spray cleaner.
2. Safety and Environmental Considerations
l Always choose a cleaner that does not corrode copper or damage solder masks.
l Avoid cleaners that leave harmful chemical residues.
l Check for RoHS / REACH compliance, ensuring the cleaner is safe for both users and the environment.
Example: Using an industrial solvent not designed for electronics can eat away traces and permanently damage your PCB.
3. Ease of Use and Cleaning Effectiveness
l Select a cleaner that evaporates quickly to avoid leaving moisture on the board.
l Low-residue cleaners are preferable to prevent sticky film buildup.
l High-efficiency cleaners save time and remove flux, dust, and oils effectively.
Example: A quick-dry PCB spray removes solder flux residues after assembly without the need for prolonged drying.
Common PCB Cleaning Problems and Solutions
Even when you clean your PCB carefully, problems can still happen. Understanding these issues and how to fix them keeps your electronics safe and working properly.
1. Short Circuits or Signal Problems After Cleaning
Sometimes, even after cleaning, a PCB may still have:
l Short circuits caused by leftover debris or moisture
l Signal interference if tiny particles are trapped under components
Solution:
l Carefully inspect solder joints and traces for damage.
l Use a magnifying glass or microscope if needed.
l Re-clean any problem areas with a safe PCB cleaner and ensure the board is completely dry before powering it on.
Example: A router may still drop Wi-Fi signals if dust remains around connectors; re-cleaning these areas usually fixes the problem.
2. PCB Corrosion After Using a Cleaner
Some cleaning agents can react with copper traces or solder, causing corrosion.
Solution:
l Always use cleaners made for electronics.
l Check the cleaner’s label for compatibility with your PCB type (rigid or flexible).
l Avoid household chemicals or industrial solvents that are not designed for PCBs.
Example: Using a strong solvent instead of a PCB-safe cleaner can create green corrosion on solder pads, ruining the board.
3. Incorrect Cleaning Frequency Causing Waste or Risk
l Cleaning too often can wear out components or waste time and resources.
l Cleaning too rarely can let dirt accumulate, increasing the risk of failure.
Solution:
l Make a cleaning schedule based on device usage and environment.
l Inspect the PCB periodically and clean only when needed.
Example: Industrial equipment in a dusty factory may need monthly cleaning, while a home computer may only need cleaning once or twice a year.
Conclusion
Keeping your PCB clean is more than just a routine task—it is an important step to make sure your electronics work properly and last longer. Regular cleaning removes dust, dirt, and residue that can block circuits, cause short circuits, or reduce performance. Choosing the right PCB cleaner ensures that your board is not damaged and that all components stay safe and reliable.
By following proper PCB maintenance practices, you can:
l Prevent common problems like overheating, signal loss, or device failure
l Maintain stable and efficient performance for your electronics
l Extend the lifespan of your devices, saving time and money on repairs
Using a professional PCB cleaner is very important. High-quality cleaners are designed to remove debris without harming the board or components. They are safe, fast-drying, and leave no residue, making maintenance easier and more effective.
If you have any questions about PCB cleaning or want to learn more about proper maintenance techniques, you can reach out to PCBMASTER. They are a trusted PCB supplier known for high-quality products, professional guidance, and excellent customer support. With the right knowledge and tools, you can make sure your electronics stay safe, reliable, and long-lasting.
FAQs
1. Can I use household cleaners to clean a PCB?
No, household cleaners like window sprays, alcohol wipes, or kitchen degreasers are not safe for PCBs. They can damage copper traces, remove protective solder masks, or leave sticky residues that cause short circuits. For example, spraying a glass cleaner on a motherboard can remove solder mask around tiny components, making them vulnerable to damage. Always use a PCB-safe cleaner made for electronics. These cleaners are gentle, evaporate quickly, and remove dust, oil, and flux without harming components. Using the correct cleaner ensures your electronics stay safe, reliable, and long-lasting.
2. How often should I inspect my PCB even if it seems fine?
Even if your device is working normally, you should inspect your PCB every 3–6 months, depending on usage and environment. Look for dust, discoloration, sticky residue, or signs of corrosion near solder joints and connectors. In dusty workshops or humid climates, check more often. For example, a desktop computer in a dusty room may need monthly inspection, while a laptop in a clean office may need less frequent checks. Regular inspections help catch small problems early, like a loose solder joint or dust under a chip, preventing major device failures.
3. Can cleaning a PCB fix a broken device?
Cleaning can solve problems caused by dirt, flux, or corrosion, such as overheating, weak signals, or short-term failures. For example, dust under a heat sink may cause a CPU to overheat; cleaning the PCB can restore normal temperature. However, if a PCB has physical damage, burned components, or broken traces, cleaning alone will not fix it. Cleaning is mainly preventive maintenance, not a repair. For serious damage, you need a professional repair or replacement. Regular cleaning reduces future failures and extends the device’s life.
4. Is it safe to clean a PCB while it is powered on?
No, never clean a PCB while it is powered on. Electricity can shock you and easily damage sensitive components. Always disconnect power and remove batteries first. Use anti-static precautions, such as a wrist strap or anti-static mat, to protect components from static electricity. After cleaning, let the PCB dry completely before reconnecting power. Even a small drop of liquid on a powered board can cause a short circuit, permanently damaging the device. Safety and careful handling are the most important steps in PCB maintenance.
5. Can moisture damage a PCB even if it looks clean?
Yes, moisture can cause serious damage even on a clean-looking PCB. Water or humidity can combine with dust or leftover flux to create corrosion or short circuits. For example, a PCB in a humid room can develop green corrosion on solder joints over time, which can block signals or cause components to fail. After cleaning, always dry the PCB completely using air drying or gentle airflow. In high-humidity areas, consider storing PCBs in anti-moisture bags or using silica gel packs. Keeping the board dry prevents corrosion and ensures long-term reliability.

