








How to Discharge a Capacitor Safely: Methods, Resistors, and PCB Applications
Discharging a capacitor safely requires controlling the stored electrical energy rather than simply shorting its terminals. The appropriate method depends on the capacitor’s voltage, capacitance, stored energy, and circuit application. For PCB design and manufacturing, discharge paths are commonly implemented with bleeder resistors, discharge resistors, switching circuits, or dedicated active discharge circuits . Understanding RC time constants, resistor power ratings, and PCB safety considerations helps prevent component damage, electrical arcing, and residual-voltage hazards.
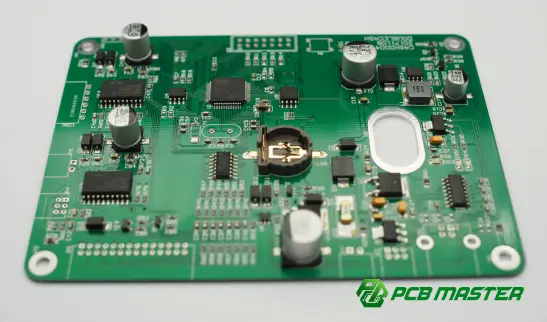
Why Do You Need to Discharge a Capacitor?
A capacitor stores electrical energy in an electric field. Even after a power supply is switched off, a capacitor may retain a significant voltage.
The stored energy can be calculated as:
E = ½CV²
where:
- E = stored energy in joules
- C = capacitance in farads
- V = capacitor voltage in volts
The important point is that a disconnected capacitor does not necessarily become electrically safe immediately .
This is particularly relevant in PCB assemblies containing:
- DC power supplies
- DC/DC converters
- AC/DC power supplies
- Motor controllers
- Battery management systems
- Inverters
- Automotive electronics
- Industrial control equipment
- High-voltage circuits
For low-voltage electronics, residual capacitor voltage may primarily cause circuit malfunction or component damage. In higher-voltage systems, however, stored energy can present a serious electrical hazard.
How to Discharge a Capacitor
There are several approaches to capacitor discharge, but they are not equally appropriate for every application.
1. Use a Resistor to Discharge the Capacitor
For PCB circuits, the most controlled passive approach is generally to connect a suitable resistor across the capacitor.
The capacitor voltage follows an exponential discharge relationship:
V(t) = V₀e⁻ᵗ⧸ᴿᶜ
where:
- V(t) = capacitor voltage after time t
- V₀ = initial capacitor voltage
- R = discharge resistance
- C = capacitance
- t = elapsed time
The RC time constant is:
τ = RC
After approximately:
| Time | Remaining Voltage |
|---|---|
| 1τ | 36.8% |
| 2τ | 13.5% |
| 3τ | 5.0% |
| 4τ | 1.8% |
| 5τ | 0.67% |
Therefore, a common engineering approximation is that a capacitor is substantially discharged after about 5 time constants .
2. Use a Bleeder Resistor
A bleeder resistor is permanently connected across the capacitor.
Its purpose is to provide a continuous path for leakage current and gradually reduce the capacitor voltage after power is removed.
This approach is widely used in power electronics because it does not depend on a technician manually discharging the capacitor.
However, resistor selection involves a trade-off.
A lower resistance discharges the capacitor faster but continuously consumes more power while the circuit is operating.
The resistor's steady-state power can be approximated by:
P = V²/R
Therefore, the resistor must have an appropriate power rating and voltage rating .
3. Use an Active Discharge Circuit
For more sophisticated PCB designs, an active discharge circuit can provide faster and more controlled discharge.
A transistor, MOSFET , relay, or dedicated discharge IC can connect a resistor to the capacitor only when discharge is required.
This approach can reduce the continuous power loss associated with a permanent bleeder resistor.
It is particularly useful when:
- The capacitor has relatively high capacitance.
- The operating voltage is high.
- Standby power consumption matters.
- A specific discharge time is required.
- The circuit needs to meet a defined safety requirement.
Should You Short a Capacitor to Discharge It?
Directly shorting a charged capacitor is generally not a recommended discharge method.
Connecting a wire or conductive tool directly across the terminals can produce a very high instantaneous current. Depending on the capacitor's voltage, capacitance, ESR, and stored energy, this can cause:
- Electrical arcing
- Sparks
- Localized heating
- PCB trace damage
- Connector damage
- Component failure
- Capacitor damage
The safer engineering principle is to control the discharge current with an appropriate impedance , rather than intentionally creating a near-zero-resistance path.
For high-voltage or high-energy capacitors, follow the equipment manufacturer's discharge procedure and applicable electrical-safety requirements rather than relying on an improvised method.
How to Choose a Capacitor Discharge Resistor
Selecting a discharge resistor requires more than choosing an arbitrary resistance value.
Step 1: Determine the Initial Voltage
Identify the capacitor's maximum possible voltage, not merely its nominal operating voltage.
For example, suppose:
- C = 1000 µF
- V₀ = 50 V
The stored energy is:
E = ½ × 0.001 × 50² = 1.25 J
That energy must be safely dissipated during discharge.
Step 2: Define the Required Discharge Time
Suppose the target is to reduce the capacitor voltage substantially within a defined period.
Using:
τ = RC
you can select an approximate resistance based on the desired time constant.
For example, with:
C = 1000 µF
and:
R = 1 kΩ
the time constant is:
τ = 1000 × 0.001 = 1 second
Approximately five time constants would therefore be about 5 seconds .
This is an engineering approximation; the actual circuit should be evaluated against its required final voltage and operating conditions.
Step 3: Check Resistor Power
At the initial voltage, the instantaneous resistor power is:
P₀ = V₀²/R
Using 50 V and 1 kΩ:
P₀ = 50²/1000 = 2.5 W
Although the power decreases as the capacitor discharges, the resistor must tolerate the initial electrical stress and the relevant pulse/energy conditions.
Capacitor Discharge on a PCB
Capacitor discharge is directly related to PCB design , particularly in power electronics.
A PCB designer may need to consider the discharge path during schematic design, component selection, layout, and safety verification.
Power Supply PCB
Large electrolytic capacitors are commonly used for DC-link filtering and power conversion.
After the input power is removed, these capacitors can remain charged. A properly designed discharge circuit can reduce the residual voltage within the required period.
DC/DC Converter PCB
Input and output capacitors in DC/DC converter circuits can also retain charge.
The designer must consider whether the converter topology naturally provides a discharge path or whether an additional resistor or active discharge circuit is necessary.
Automotive PCB
Automotive electronics can contain substantial energy-storage components and strict electrical requirements.
For applications such as:
- BMS
- OBC
- DC/DC converters
- Inverters
- Motor controllers
capacitor discharge behavior can become part of the overall safety and system-design analysis.
Common Capacitor Discharge Methods Compared
| Method | Discharge Control | Continuous Power Loss | Typical PCB Application |
|---|---|---|---|
| Direct short circuit | Very poor | None | Generally not recommended |
| Temporary resistor | Good | None after removal | Service/testing |
| Bleeder resistor | Good | Yes | Power supplies |
| MOSFET-controlled resistor | Very good | Low | Advanced power electronics |
| Dedicated discharge circuit | Very good | Application dependent | Safety-critical/high-performance systems |
| Natural leakage | Poor/unpredictable | Very low | Generally not relied upon for safety |
The key design principle is to make the discharge path predictable, controlled, and compatible with the circuit's electrical and thermal requirements.
Common Mistakes When Discharging Capacitors
Mistake 1: Assuming the Capacitor Is Safe Because Power Is Off
Turning off the power supply does not automatically mean the capacitor has reached a safe voltage.
Always verify the actual voltage with an appropriate meter and procedure before handling a potentially charged circuit.
Mistake 2: Using an Undersized Resistor
A resistor may have the correct resistance but an inadequate power, pulse-energy, or voltage rating.
The complete electrical stress should be evaluated.
Mistake 3: Ignoring PCB Creepage and Clearance
In high-voltage PCB designs, the discharge circuit cannot be considered independently of the PCB layout.
The designer should also evaluate:
- Creepage distance
- Clearance
- Component voltage ratings
- PCB material
- Conductor spacing
- Insulation requirements
- Discharge-path routing
Mistake 4: Choosing Discharge Speed Without Considering System Operation
A very low discharge resistance may discharge the capacitor quickly, but it can also introduce excessive operating losses.
For battery-powered or energy-efficient equipment, this can directly affect system efficiency and standby consumption.
How PCB Manufacturers Support Capacitor Discharge Design
Capacitor discharge is primarily a circuit and electrical-design consideration , but PCB manufacturing quality can influence how reliably the intended discharge circuit is implemented.
For example, accurate PCB fabrication is important when the design includes:
- High-voltage spacing requirements
- High-current discharge paths
- Power components
- Thermal-management requirements
- HDI structures
- Rigid-flex configurations
- Automotive electronics
For a PCB manufacturer such as PCBMASTER, engineering file review can help identify manufacturability issues before production. Its PCB and PCBA capabilities cover applications ranging from prototypes to advanced boards, including HDI, FPC, rigid-flex, high-frequency, and metal-core PCBs .
The manufacturer also states that its products operate under ISO 9001, IATF 16949, UL, and RoHS requirements, which can be particularly relevant when PCB assemblies are developed for demanding industrial and automotive applications.
Practical Design Checklist
Before finalizing a capacitor discharge circuit, engineers should verify:
- Capacitor voltage
- Capacitance
- Stored energy
- Required discharge time
- Target residual voltage
- Discharge resistance
- Initial resistor power
- Pulse-energy capability
- Resistor voltage rating
- PCB creepage and clearance
- Thermal performance
- Standby power consumption
- Component tolerances
- Failure behavior
- Applicable safety requirements
For high-voltage or high-energy capacitors, the discharge design should be reviewed as part of the complete electrical-safety architecture rather than treated as a simple resistor-selection exercise.
Conclusion
Knowing how to discharge a capacitor is important for both electronics troubleshooting and PCB design. The most appropriate method depends on the capacitor's voltage, capacitance, stored energy, required discharge time, and the application's safety requirements.
For PCB applications, a properly sized bleeder resistor or controlled active discharge circuit is generally more predictable than directly shorting a charged capacitor. Engineers should evaluate not only the RC time constant but also resistor power, voltage stress, PCB creepage and clearance, thermal behavior, and system-level safety.
As PCB designs move toward higher power density and more complex power architectures, capacitor discharge should be considered during the schematic, component-selection, PCB layout, manufacturing, and validation stages rather than as an afterthought.
Tags
#Capacitor #CapacitorDischarge #PCB #PCBDesign #PCBA #PowerElectronics #CircuitDesign #ElectronicsEngineering #DCConverter #PCBManufacturing
About the Author

Carol Luo
PCB Design EngineerI'm Carol, a PCB Engineer at PCBMASTER with experience in PCB design and manufacturing engineering since 2018. I focus on translating engineering requirements into reliable PCB solutions, with expertise in stack-up design, material selection, and design-for-manufacturing (DFM). I share practical engineering insights from real-world PCB design and production experience.
Visit Carol Luo's Profile